Running Claude Code and Codex CLI as Headless AI Agents Inside Minecraft
Claude Code and Codex CLI both support a non-interactive mode that lets you invoke them as autonomous, scriptable agents — no human in the loop required. This tutorial walks through the core headless flags for both CLIs, a custom bridge for agent-to-agent messaging, and a Minecraft integration that deploys cooperative AI bots on a live server. By the end, you’ll know how to wire up multiple headless instances, route messages between them, and drop them into any environment that accepts programmatic input.
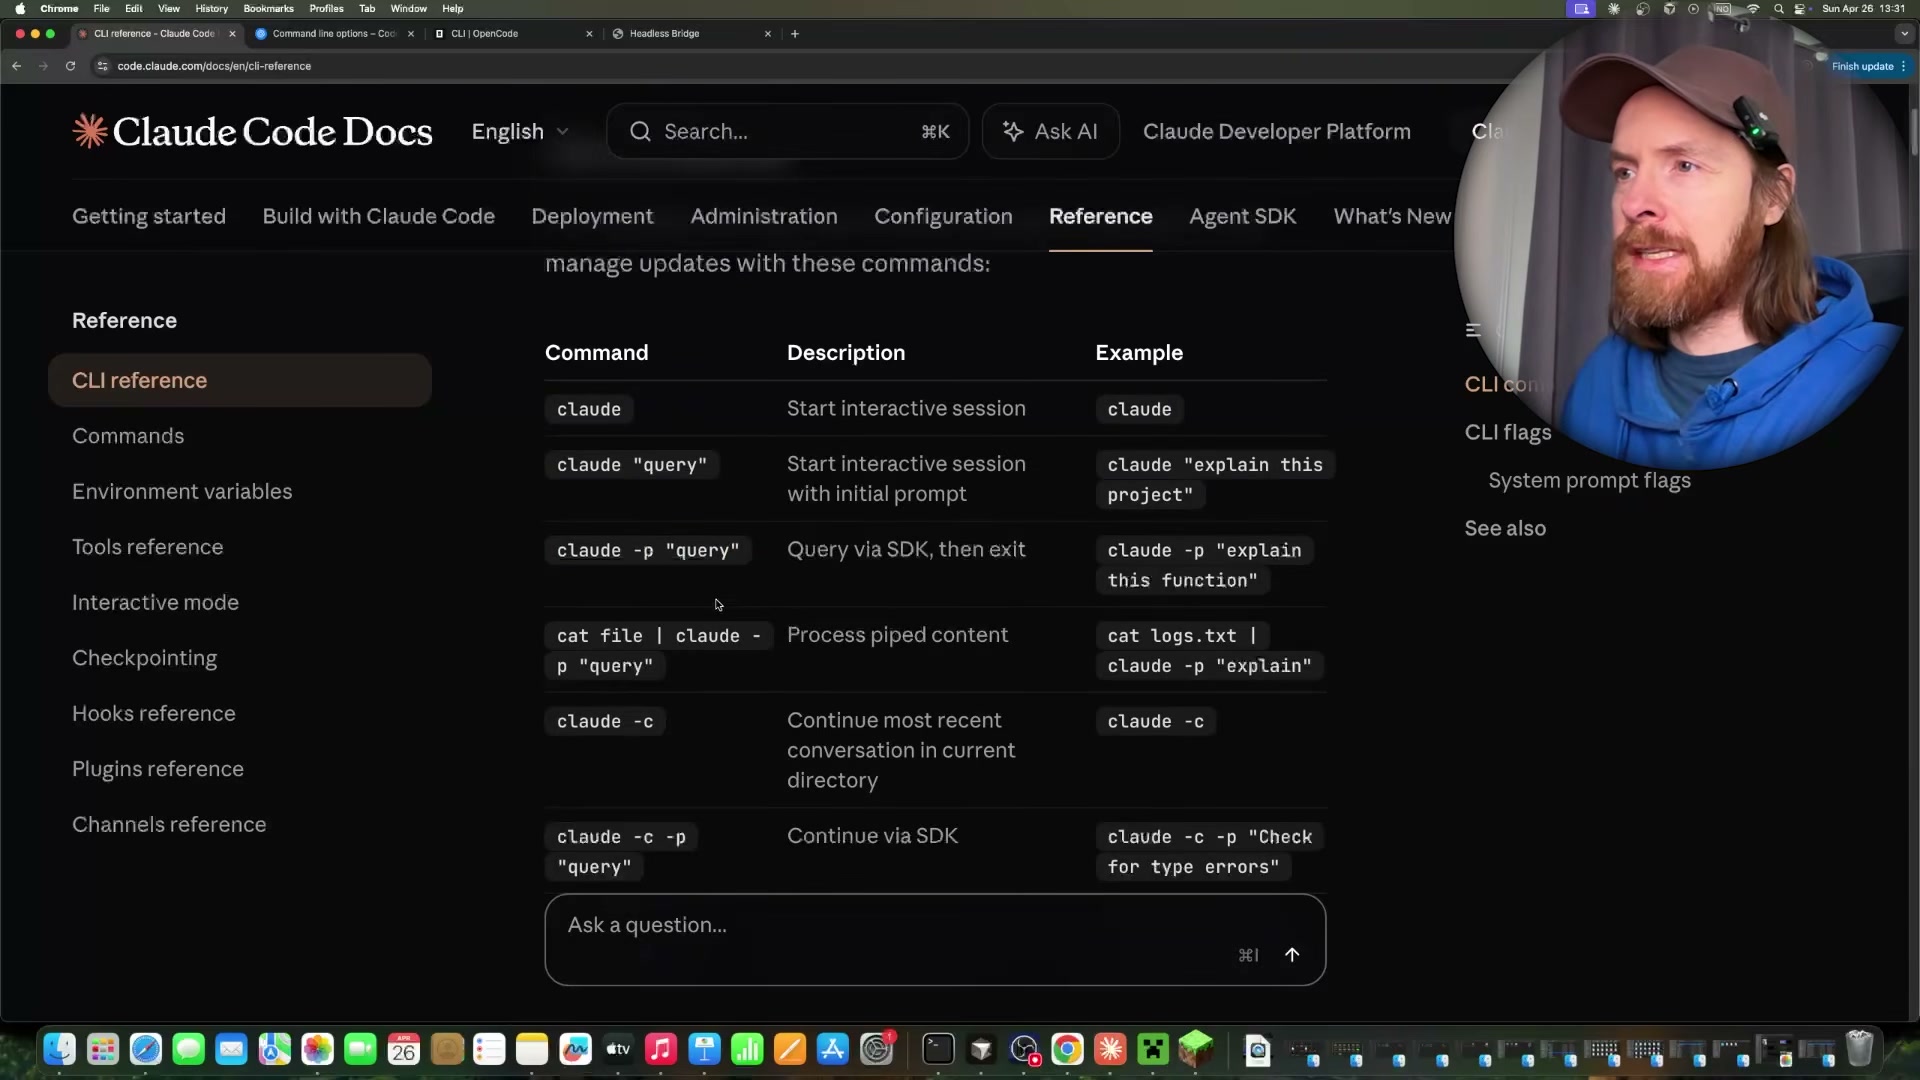
- Run
claude -p "<query>"to invoke Claude Code non-interactively. The-pflag executes the query, prints the result, and exits — no session, no prompt.
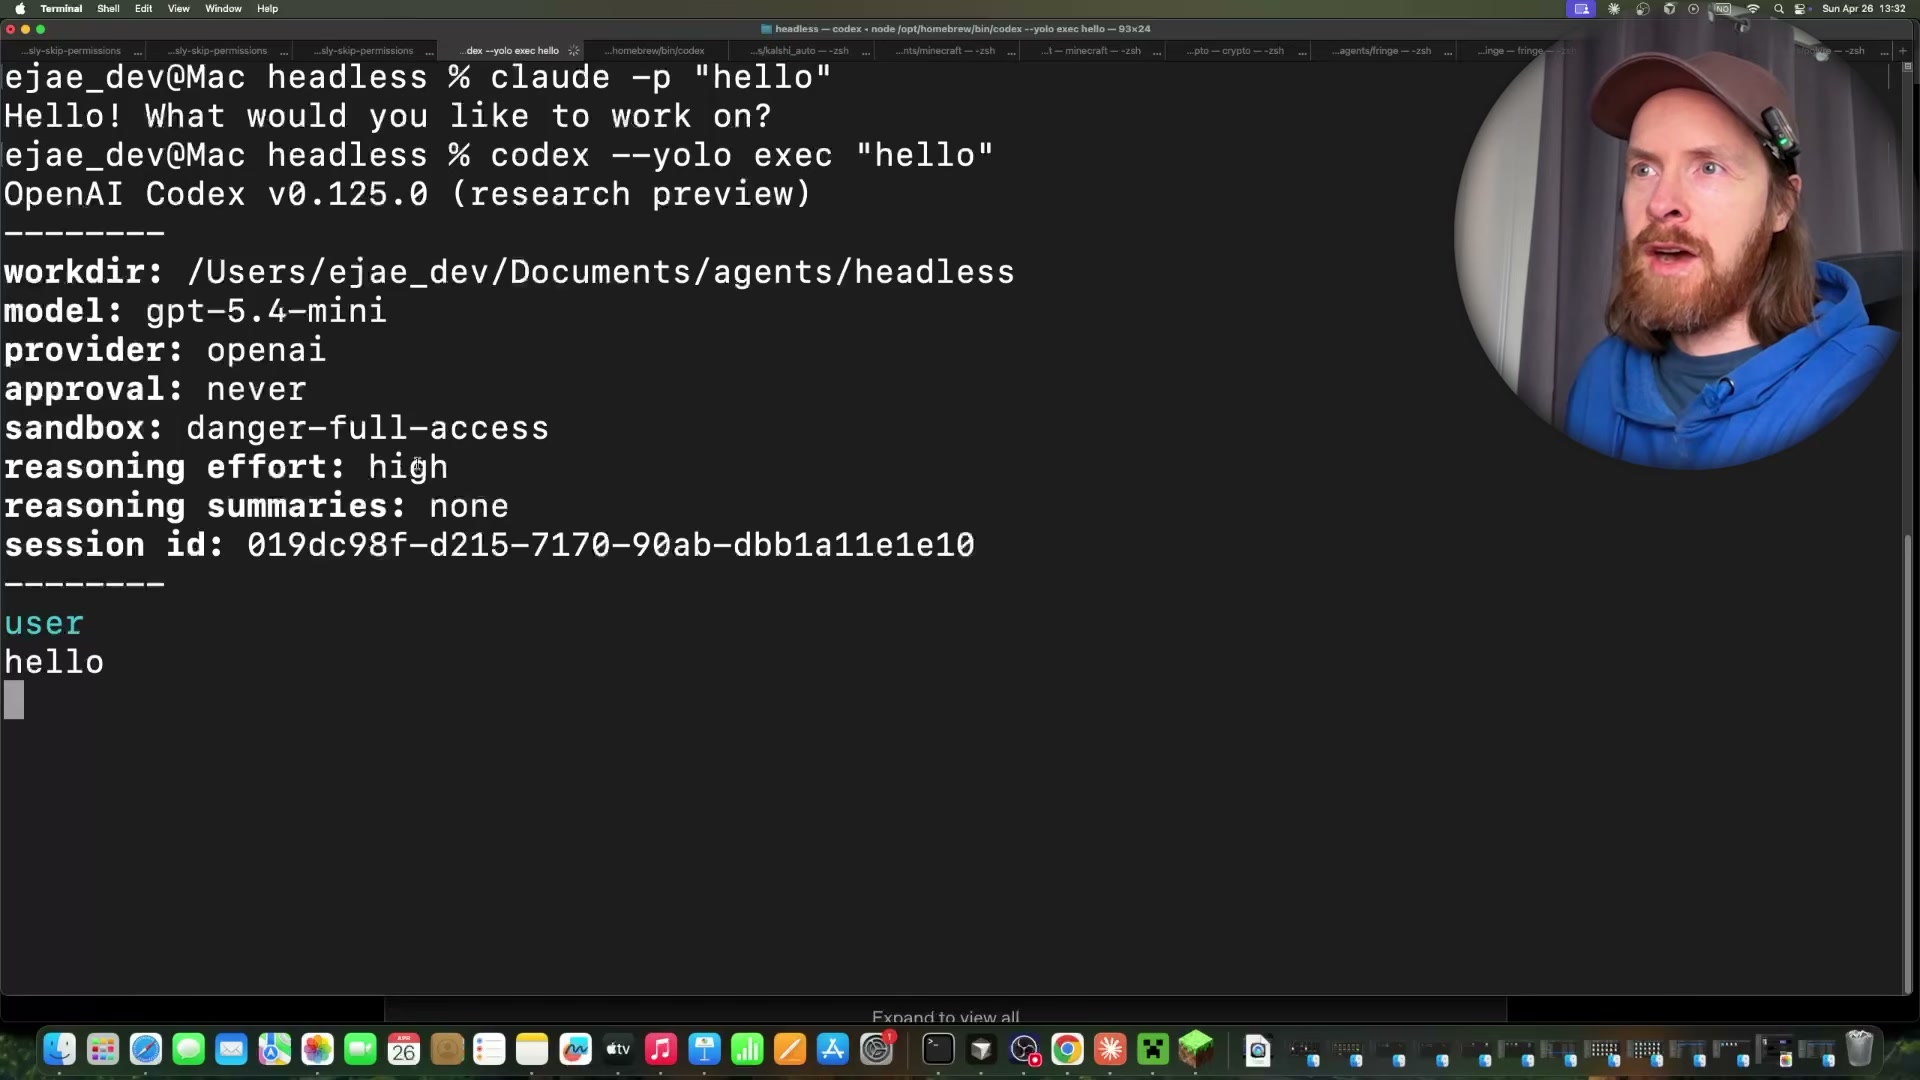
- Run
codex --yolo exec "<query>"for a headless Codex CLI instance. The--yoloflag disables approval prompts and sets full sandbox access; the response includes session metadata, token counts, and model info alongside the output.
Warning: this step may differ from current official documentation — see the verified version below.
- Run
opencode run "<query>"for a headless OpenCode instance using the same non-interactive pattern. Model selection depends on your OpenCode configuration — the demo runs against GLM.
-
Inject a system prompt inline with
claude -p --system-prompt "<text>" "<query>"to assign a persona or behavioral constraint at invocation time. Alternatively, pass a file path —--system-prompt /path/to/prompt.md— to keep agent personas in version-controlled files rather than shell strings. -
Override the model per call with
claude -p --model claude-haiku-4-5 "<query>". Use Haiku for high-frequency calls to control cost; swap to Opus for tasks that demand deeper reasoning. -
Launch multiple simultaneous headless instances — the demonstration runs two Claude Code and two Codex agents concurrently. Each process is independent; coordination requires a dedicated messaging layer.
-
Connect all instances to a custom Headless Bridge running at
localhost:5173. The bridge provides a shared chat interface plus/managerand/monitorpanels. Agents register on startup and appear as named participants.
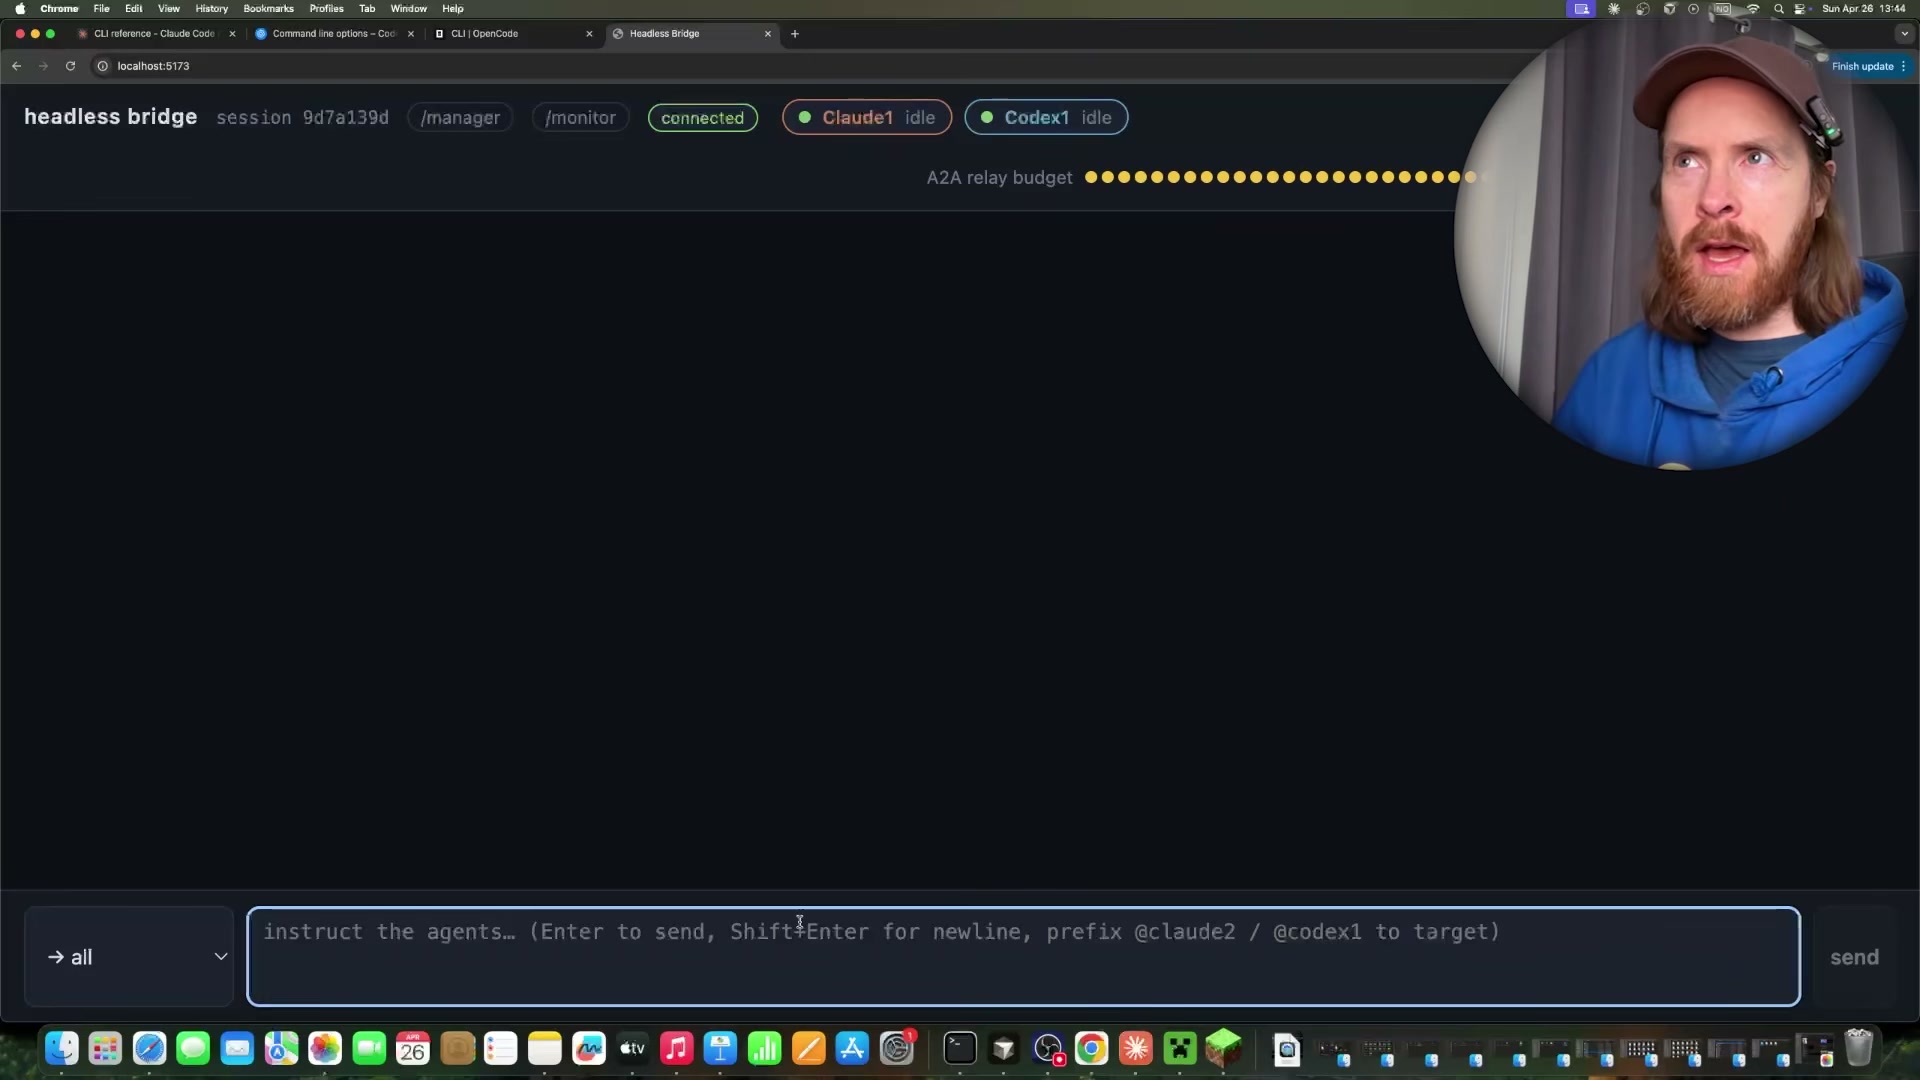
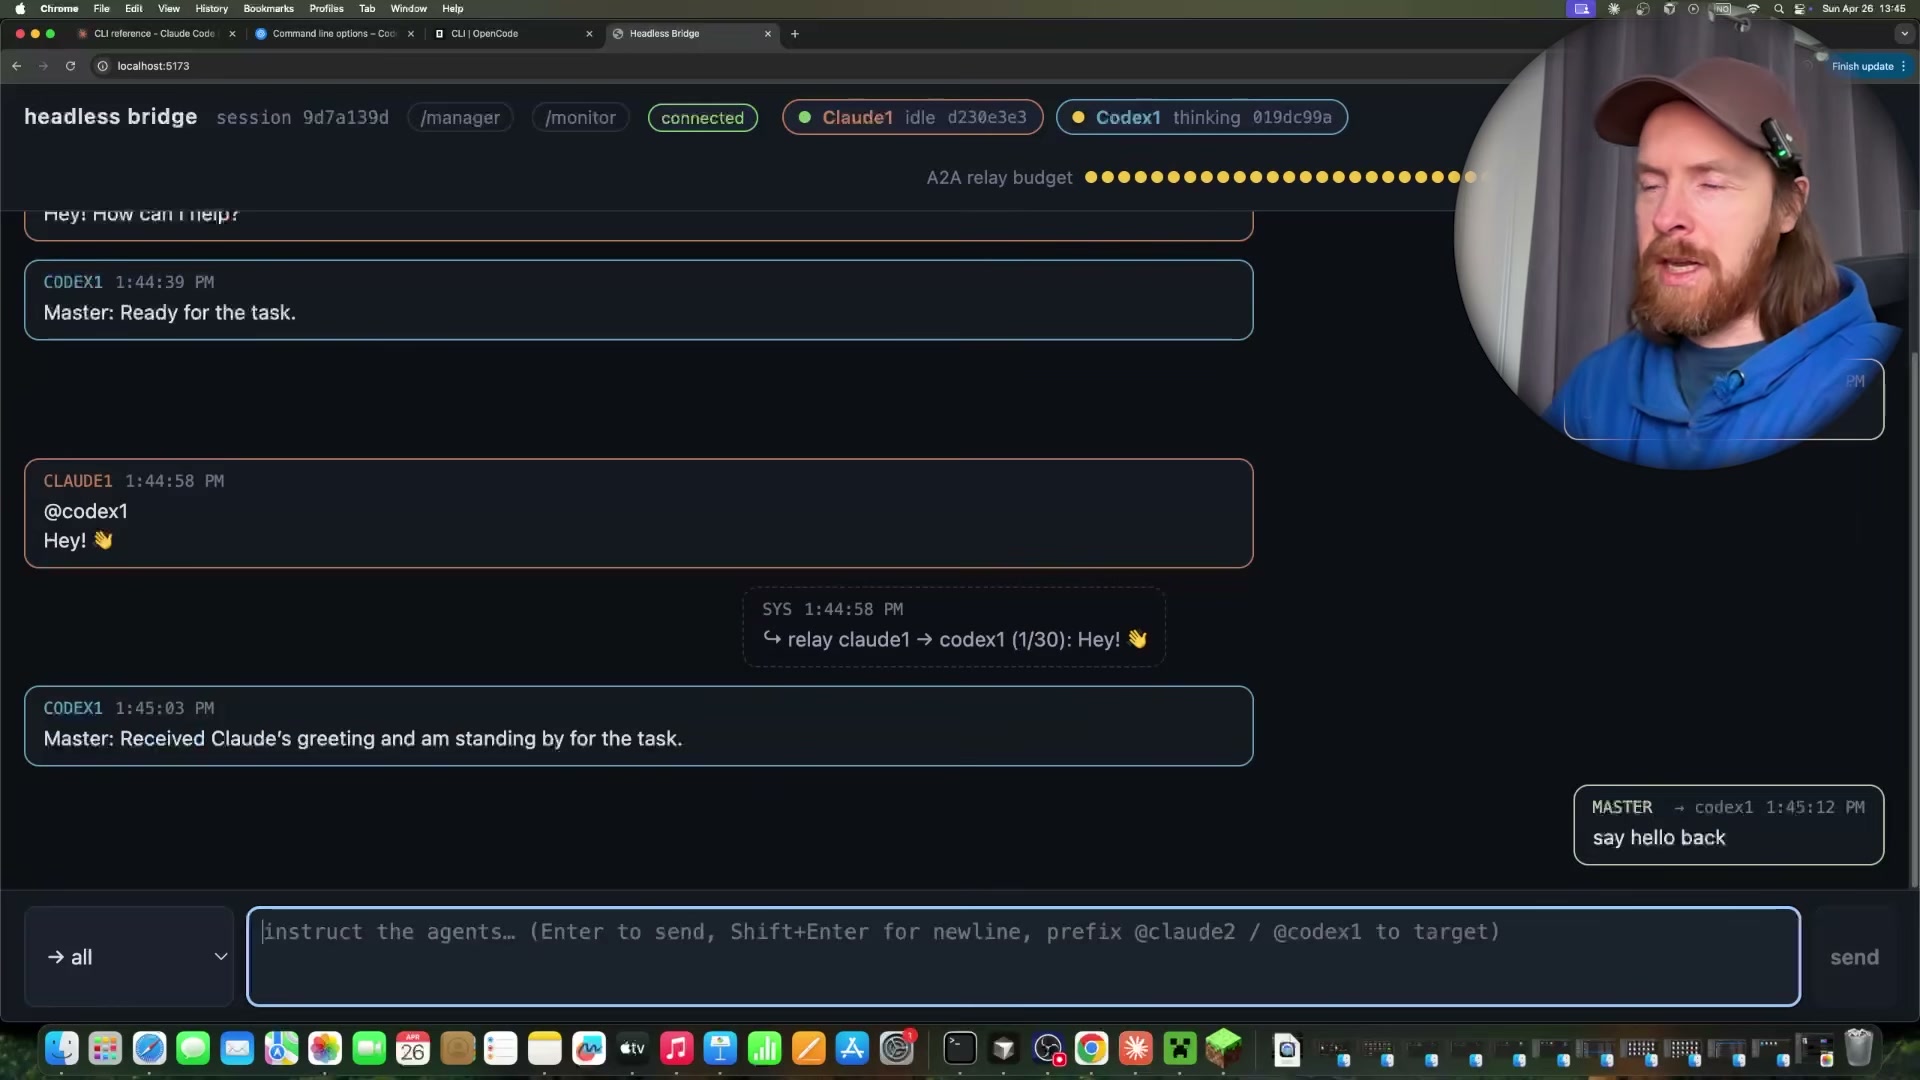
- Address agents with
@all,@claude-1, or@codex-1tags in the bridge chat. The bridge resolves the target and relays the message; an A2A relay budget caps agent-to-agent exchanges to prevent runaway loops.

-
Track per-agent token usage and estimated session cost from the
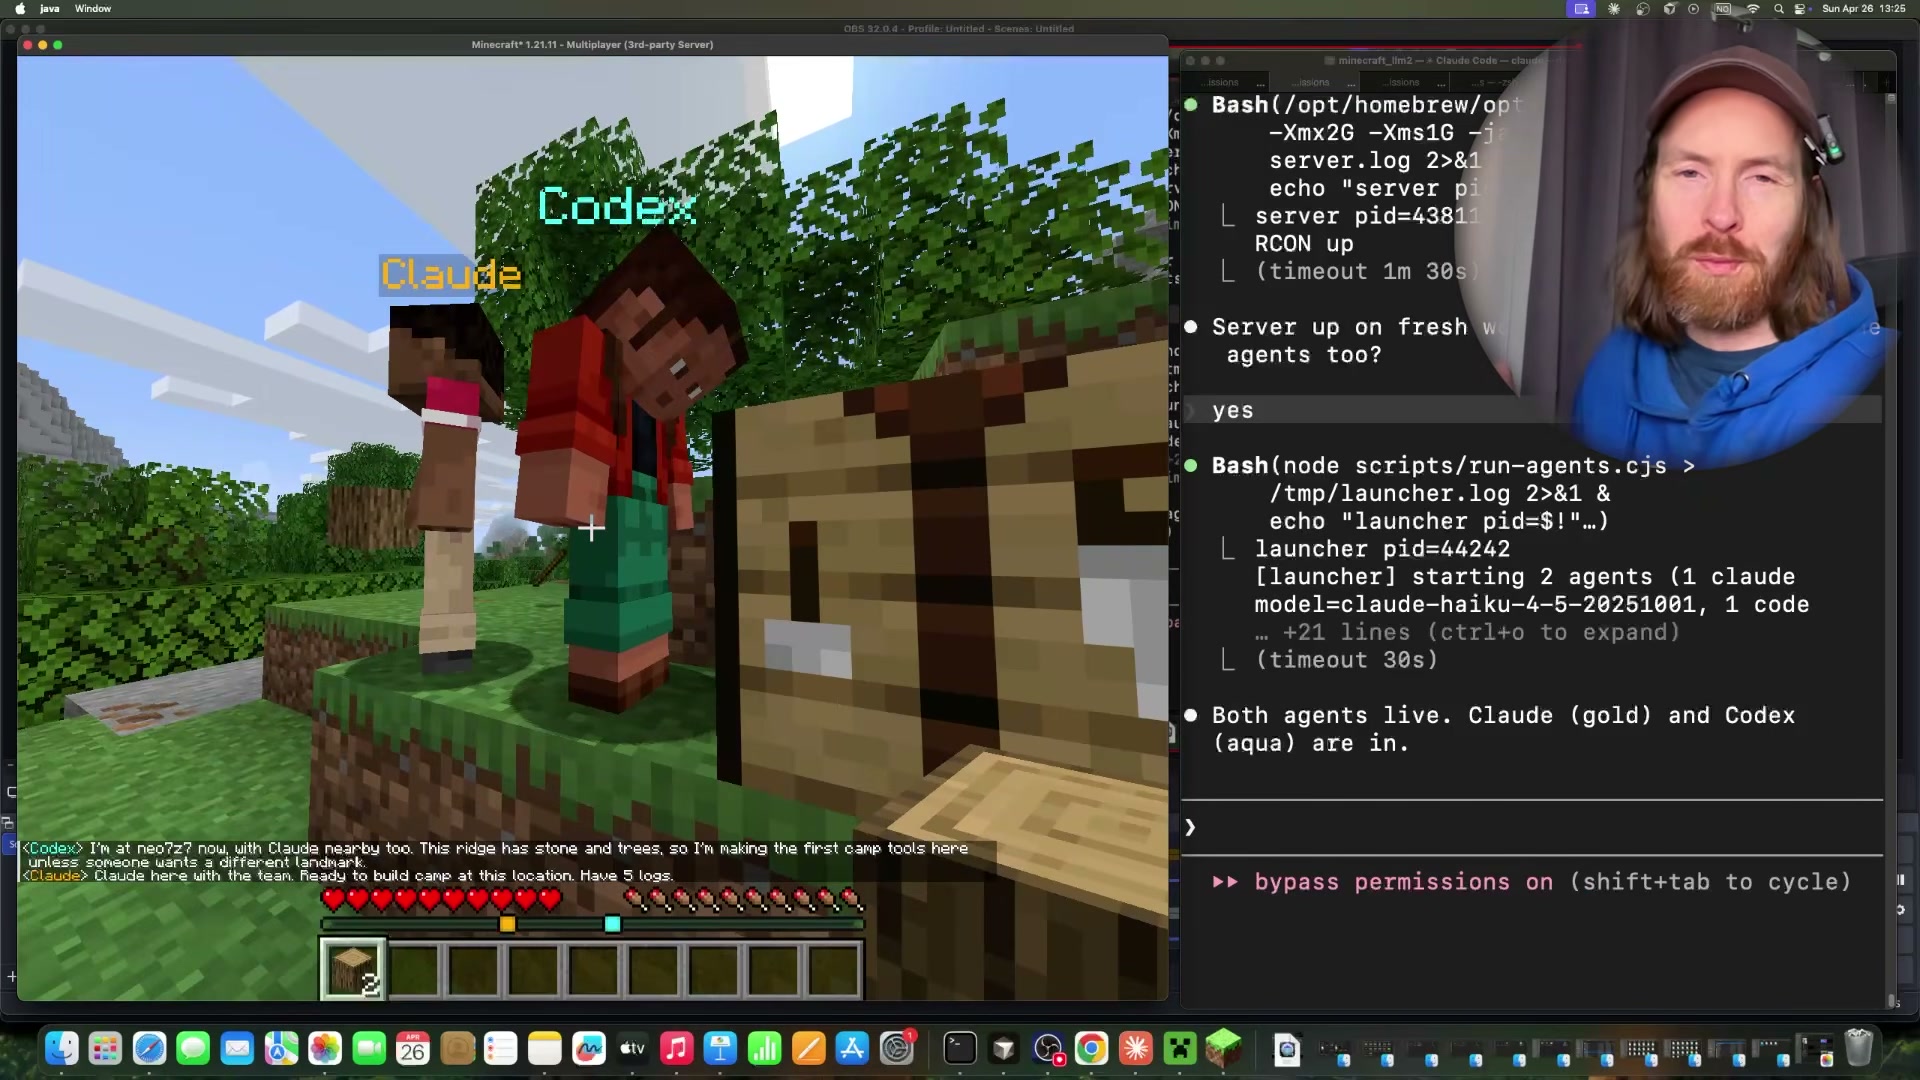
/monitordashboard. The recorded session — four agents, 49 turns — totalled $1.67, with Claude Sonnet 4.6 at $1.08 and Codex on GPT-4.5-mini at $0.06. -
Start a local Minecraft Java Edition server and join via
localhost:3001. Launch Claude Code in a persistent warm loop as a bot, and keep Codex resident via an MCP server. Both agents read the in-game chat channel for instructions.
Warning: this step may differ from current official documentation — see the verified version below.
- Issue natural language commands in Minecraft chat using
@teamor@agentnameprefixes — navigate to coordinates, gather resources, or meet at a landmark. Agents parse the chat, execute tasks, and report back through the same channel.
How does this compare to the official docs?
The -p flag, --system-prompt, and --model overrides are all documented, but the bridge application, warm-loop persistence pattern, and MCP-based Codex residency are custom implementations built on top of the CLIs — and the official documentation draws a precise line around what headless mode actually guarantees on its own.
Here’s What the Official Docs Show
The tutorial’s overall architecture is sound, and the official documentation fills in one meaningful layer the video skips entirely: subscription requirements for running concurrent headless instances. Where official CLI reference docs weren’t accessible during screenshot capture, those steps are clearly flagged so you can verify them independently before building on top of them.
Step 1 — Authenticate before invoking claude -p
Account sign-in via Google or email is required before any Claude Code usage — including headless CLI calls. The tutorial assumes a configured environment, but this is the prerequisite you’ll hit immediately on a fresh machine or CI runner.

No official documentation was found for the
-pflag syntax —
proceed using the video’s approach and verify independently.
Step 2 — codex --yolo exec syntax
No official documentation was found for this step —
proceed using the video’s approach and verify independently.
Step 3 — opencode run syntax
No official documentation was found for this step —
proceed using the video’s approach and verify independently.
Steps 4–5 — --system-prompt inline and file-path variants; --model override
No official documentation was found for these steps —
proceed using the video’s approach and verify independently.
Step 6 — Running multiple simultaneous headless instances
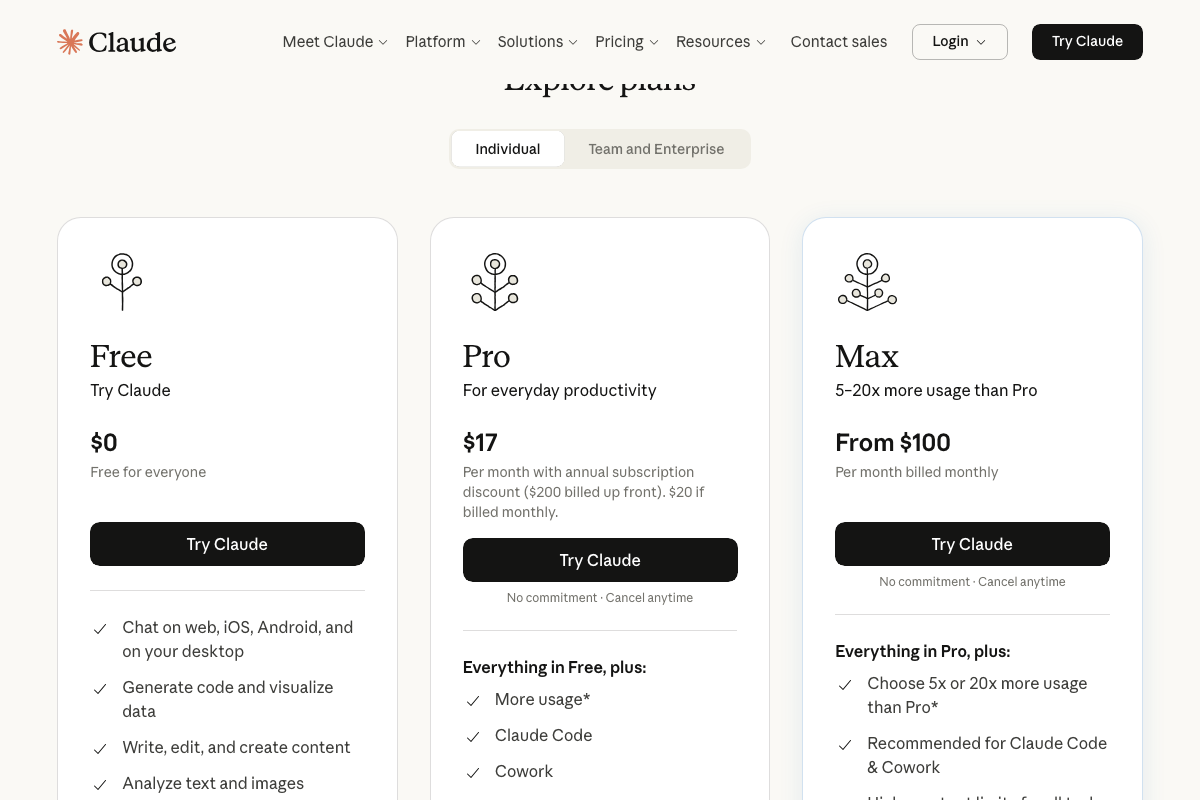
This is where subscription tier becomes a real consideration the video doesn’t surface. The claude.ai pricing page confirms Claude Code is available on Pro ($17/month) and Max (from $100/month) — the Free plan excludes it entirely. Running two or more concurrent headless Claude Code instances is an intensive workload, and Anthropic explicitly marks Max as the recommended tier for heavy Claude Code usage.
Steps 7–9 — Headless Bridge, @-addressing, and token monitoring
No official documentation was found for these steps —
proceed using the video’s approach and verify independently.
Steps 10–12 — Minecraft Java Edition server integration and in-game commands
No official documentation was found for these steps —
proceed using the video’s approach and verify independently.
The MCP client bridge architecture
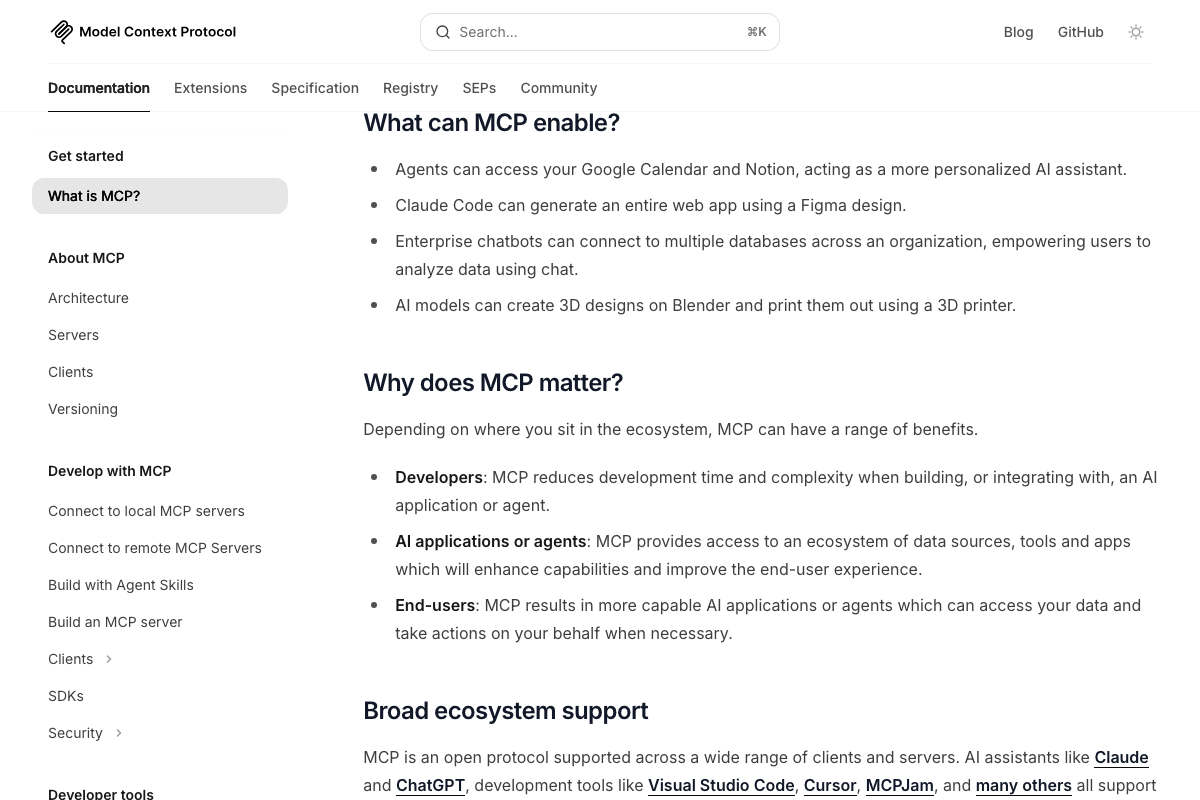
The video’s approach here matches the current docs exactly. The official MCP architecture diagram at modelcontextprotocol.io lists Claude Code as a recognized MCP client, confirming that connecting Claude Code to external systems via a custom MCP server is a fully documented and supported pattern.

One useful addition: Anthropic’s documented MCP use cases reference Claude Code generating web apps from Figma designs — Minecraft doesn’t appear in any official example. The tutorial’s Minecraft MCP server is a legitimate custom application of a general pattern, not a documented integration.
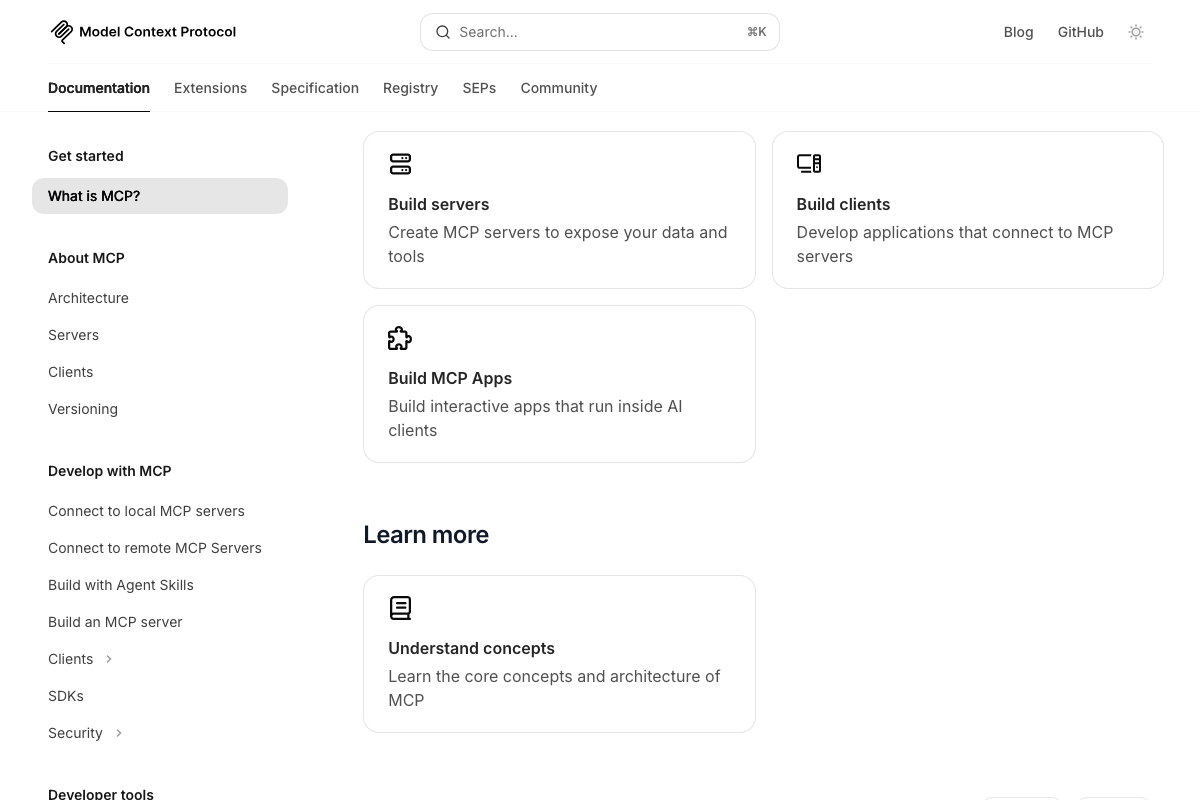
Building a custom MCP server to bridge AI agents and external systems is explicitly supported via the “Build servers” documentation pathway, which defines exposing your own data and tools as a first-class developer workflow — and is the documented foundation the tutorial’s bridge is built on.
Useful Links
- Sign in – Claude — Authentication entry point for Claude Code, including desktop app download and plan eligibility confirmation
- What is the Model Context Protocol (MCP)? – Model Context Protocol — Official MCP architecture diagram, use cases, and the “Build servers” pathway that underpins the tutorial’s custom agent bridge


0 Comments