How to Optimize Image SEO for Thousands of Organic Impressions
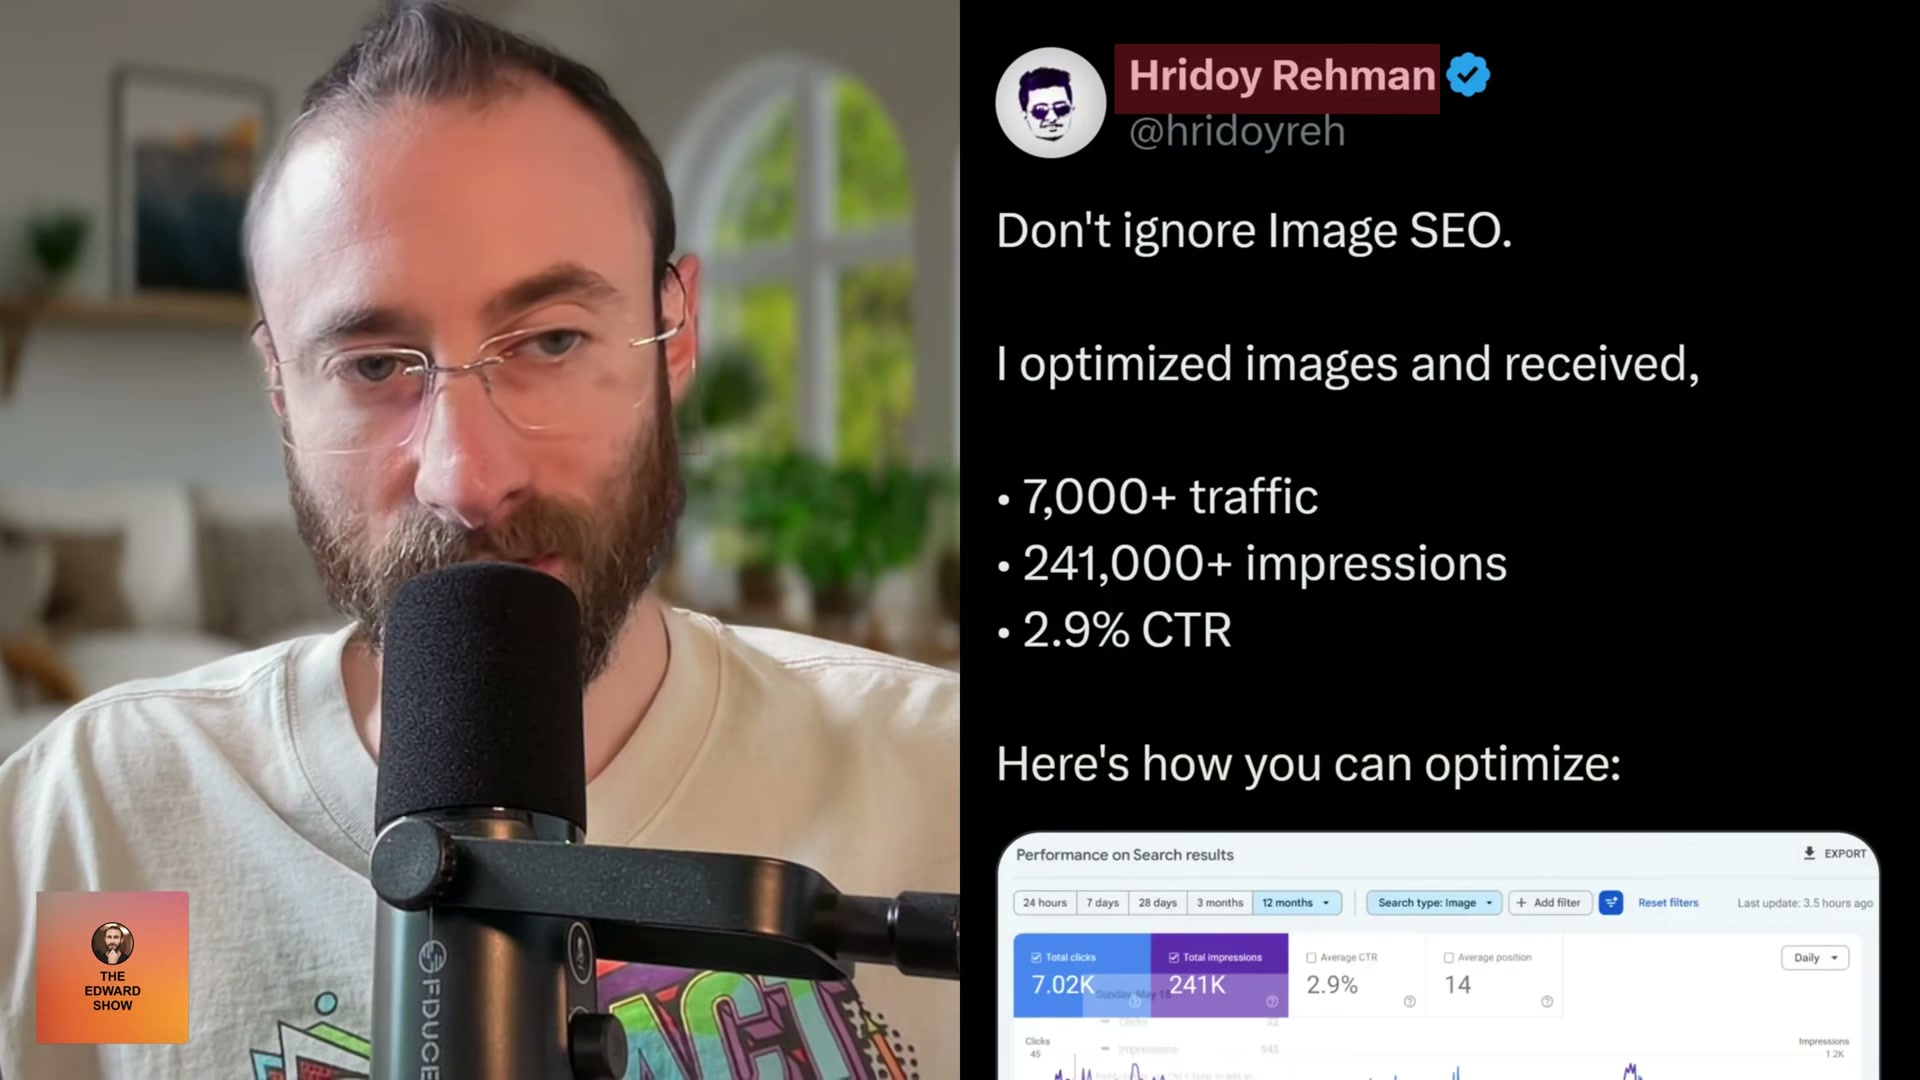
Image SEO is one of the most overlooked levers in organic search — yet a single optimization pass can produce hundreds of thousands of impressions. After applying the five techniques in this tutorial, you’ll know how to rename, compress, and annotate images so Google can index them as contextual content, not invisible page decorations. The results below came from a real site, not a controlled experiment.
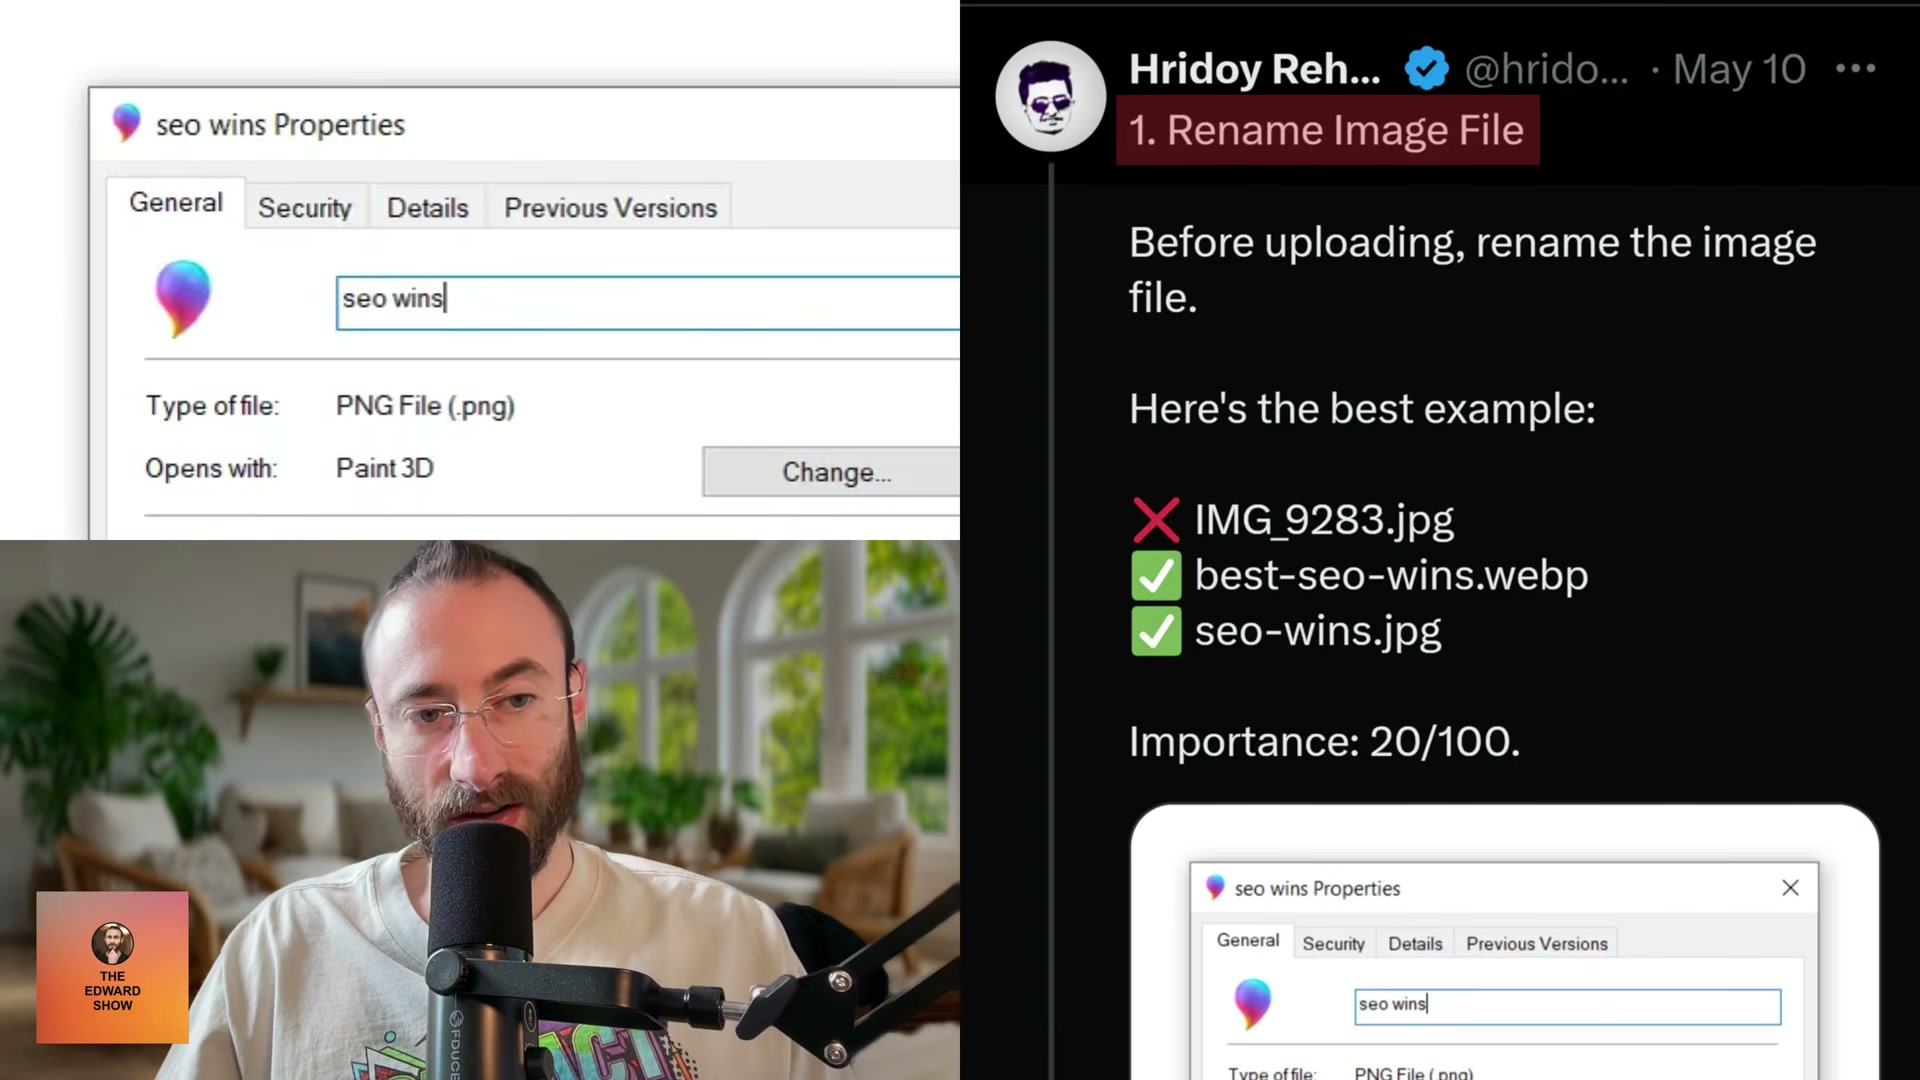
- Rename image files before uploading. Your file name is a signal, so make it count. Replace generic auto-generated names like
IMG_9283.jpegwith descriptive, dash-separated slugs —best-seo-wins.webpis the pattern to follow. Do this before the file hits your CMS; renaming after upload doesn’t retroactively change what Google has already crawled.
-
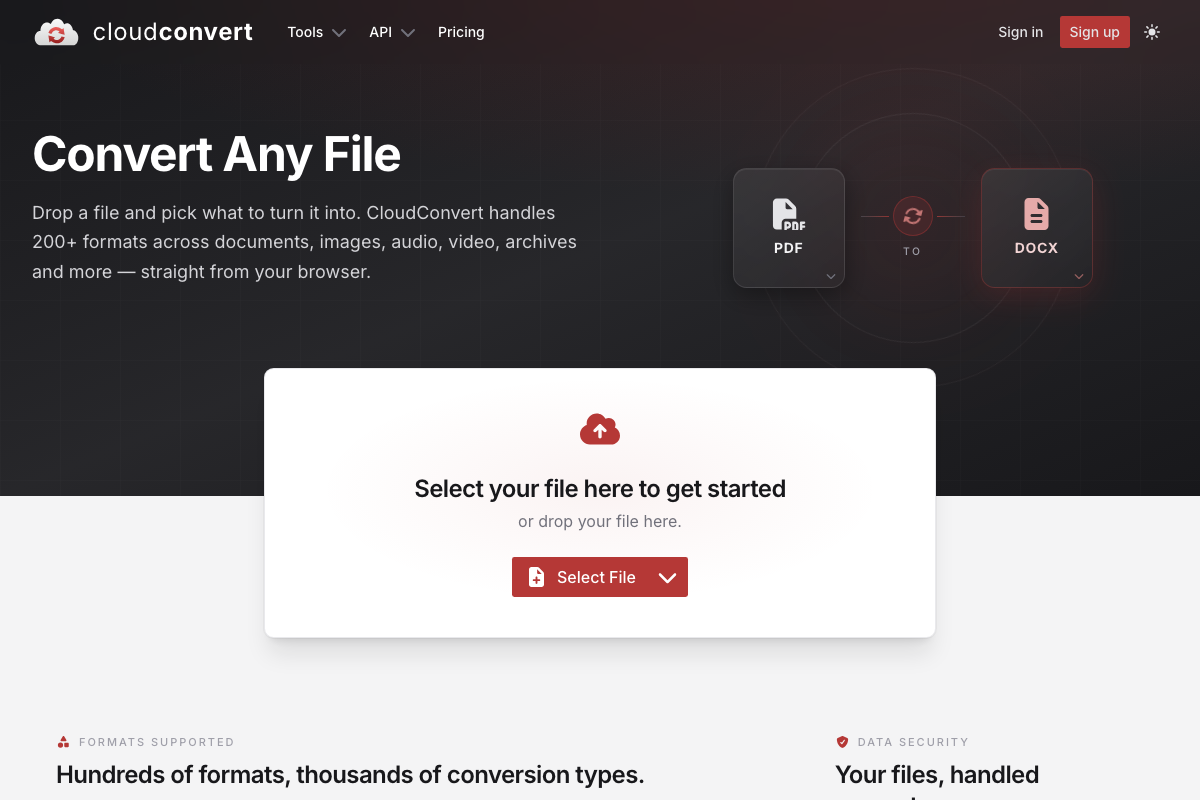
Compress images and convert to WebP. Large images slow page load, and page speed is a ranking factor. Convert PNGs and JPEGs to WebP using a tool like CloudConvert or any converter you find by searching “png to webp.” WebP consistently produces smaller file sizes than JPEG at equivalent visual quality, making it the default format to target.
-
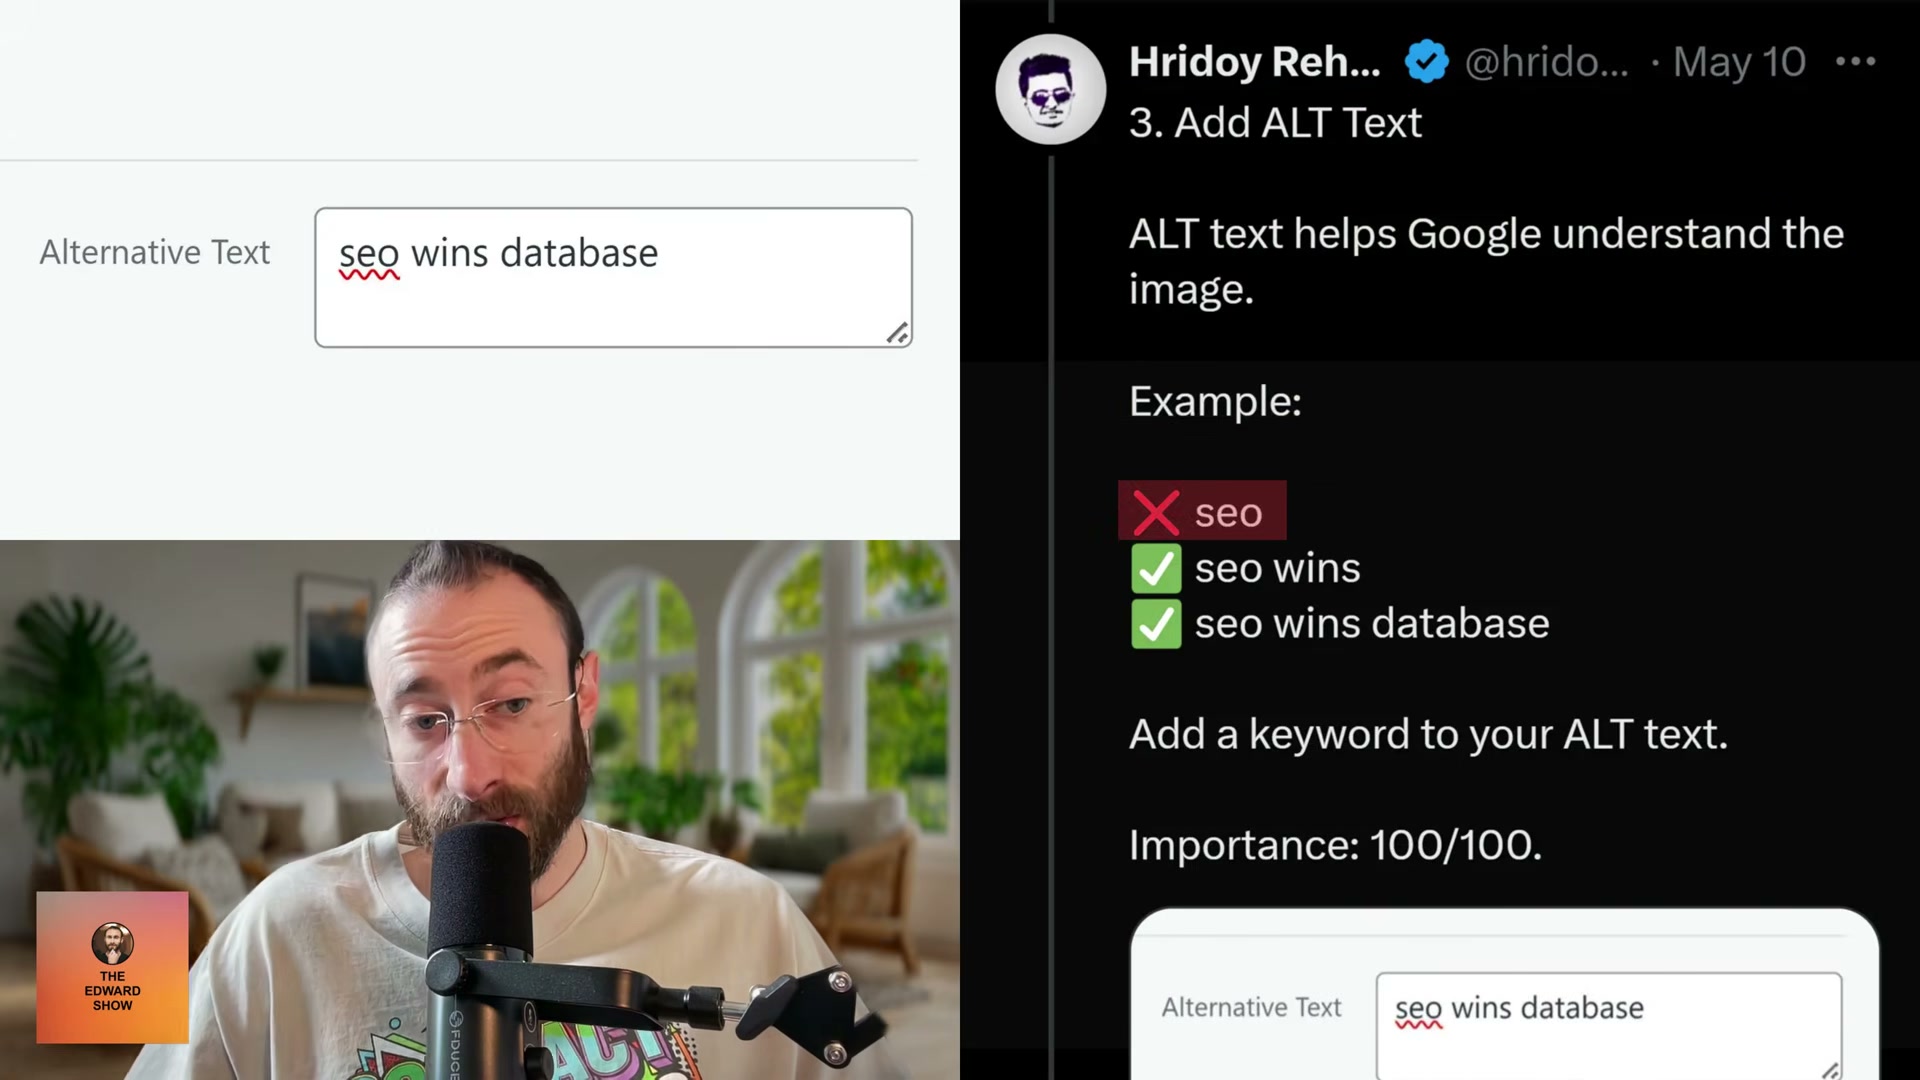
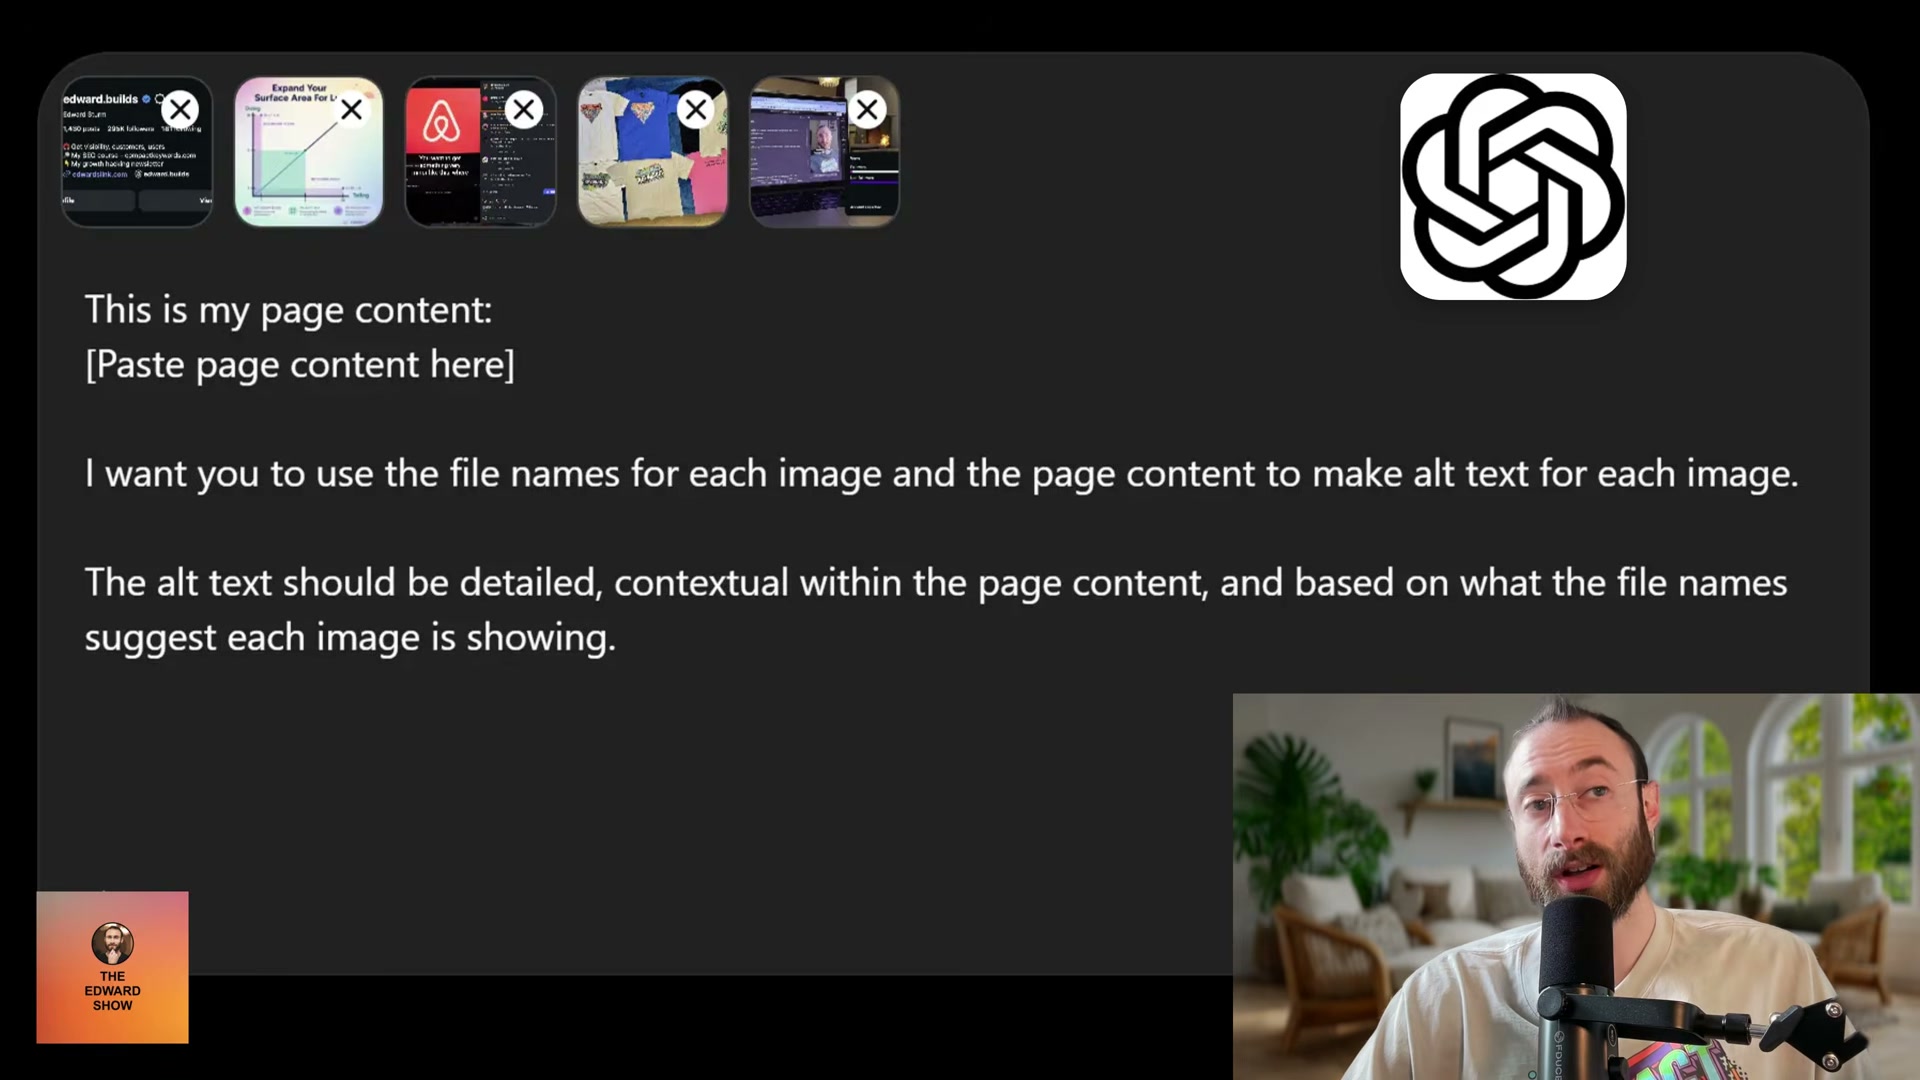
Generate detailed, contextual alt text using AI. This is the highest-leverage step. Rather than typing a single keyword into the alt text field, paste your full page content — headings, body copy, everything — into ChatGPT or Claude alongside your image file names. Prompt the model to write alt text for each image that is detailed and contextual to both the file name and the surrounding page content. The file name functions as a directive; the page content gives the model the context to expand it accurately.
-
Use original images. Stock photos are indexable, but they’re not unique — thousands of other pages use the same file. Custom screenshots, job-site photography, team photos, and annotated product screenshots give Google something it hasn’t seen before. For pages that share the same images, upload a separate copy per page so each instance can carry a page-specific file name and alt text.
-
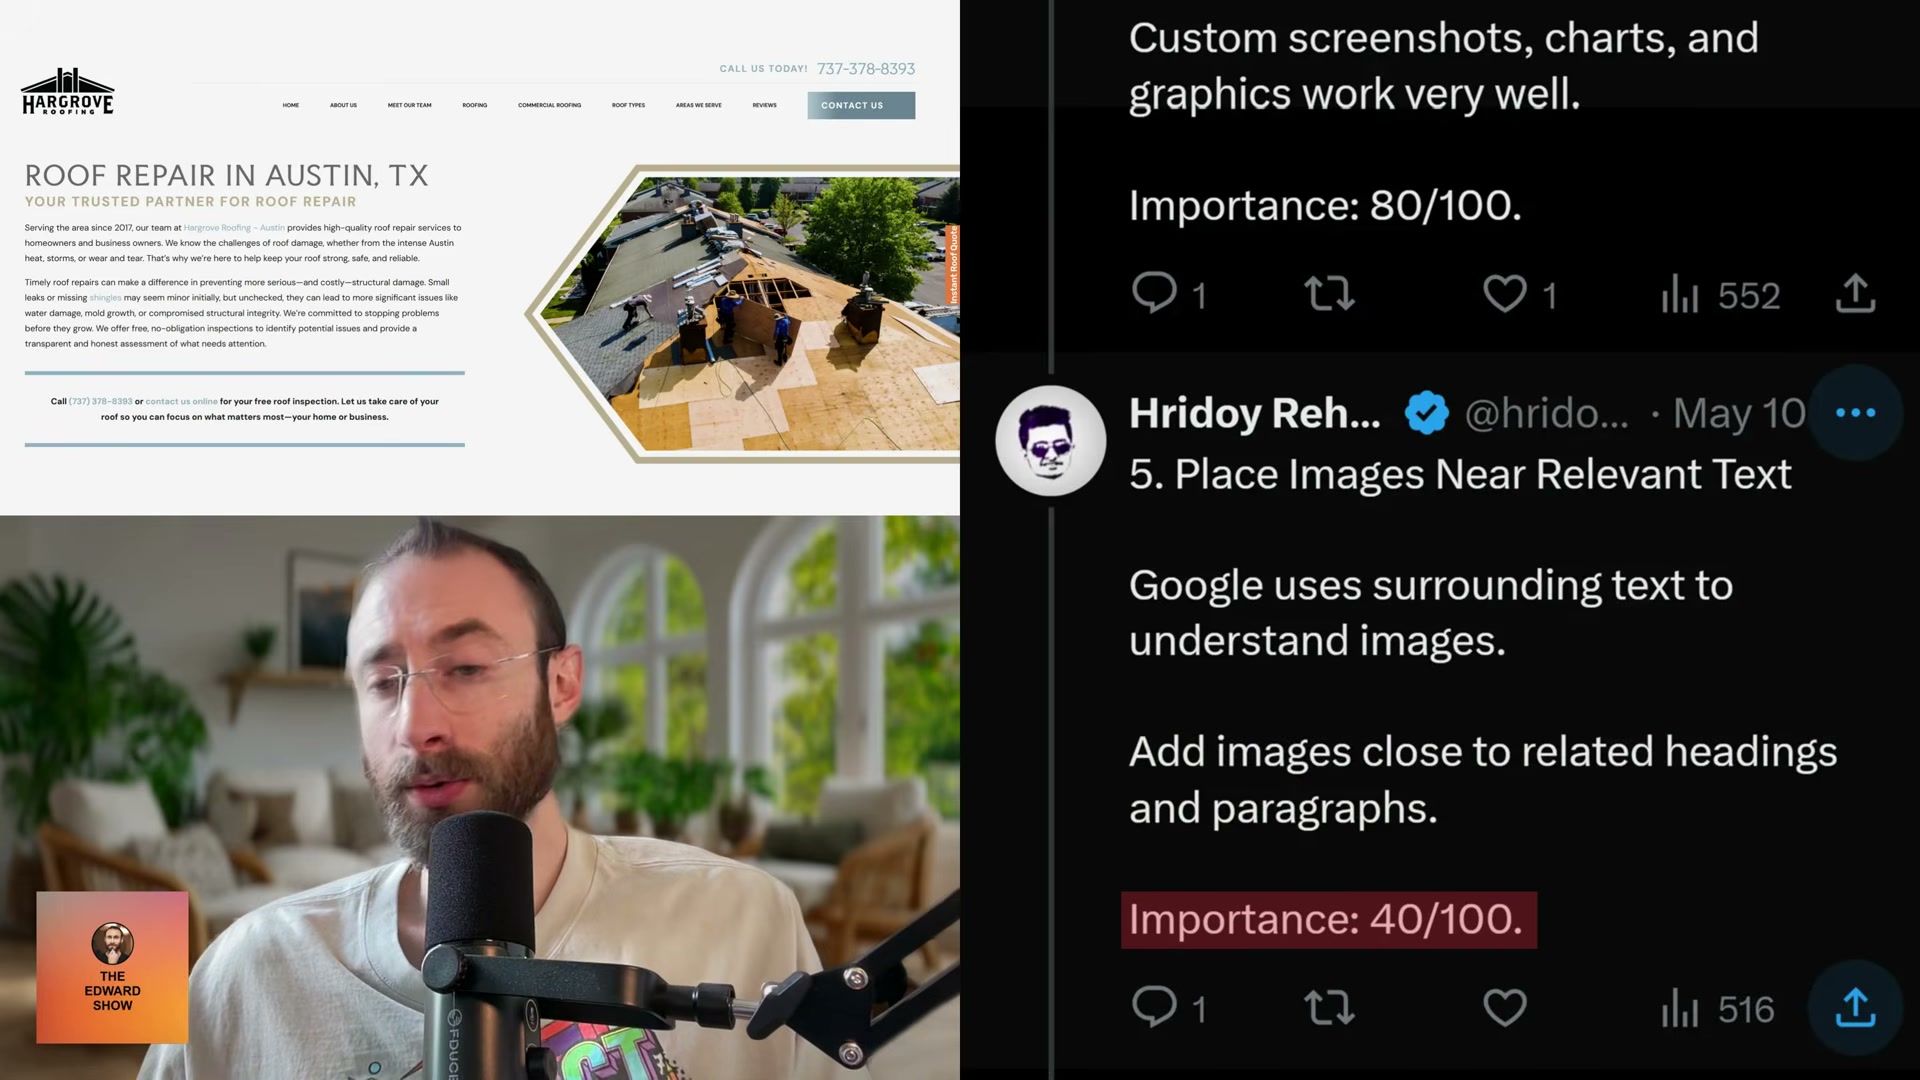
Place images near relevant headings and paragraphs. Google uses surrounding text as additional context for understanding what an image depicts. An image dropped into a visually convenient but semantically unrelated section of a page loses that contextual boost. Position each image adjacent to the heading or paragraph it illustrates.
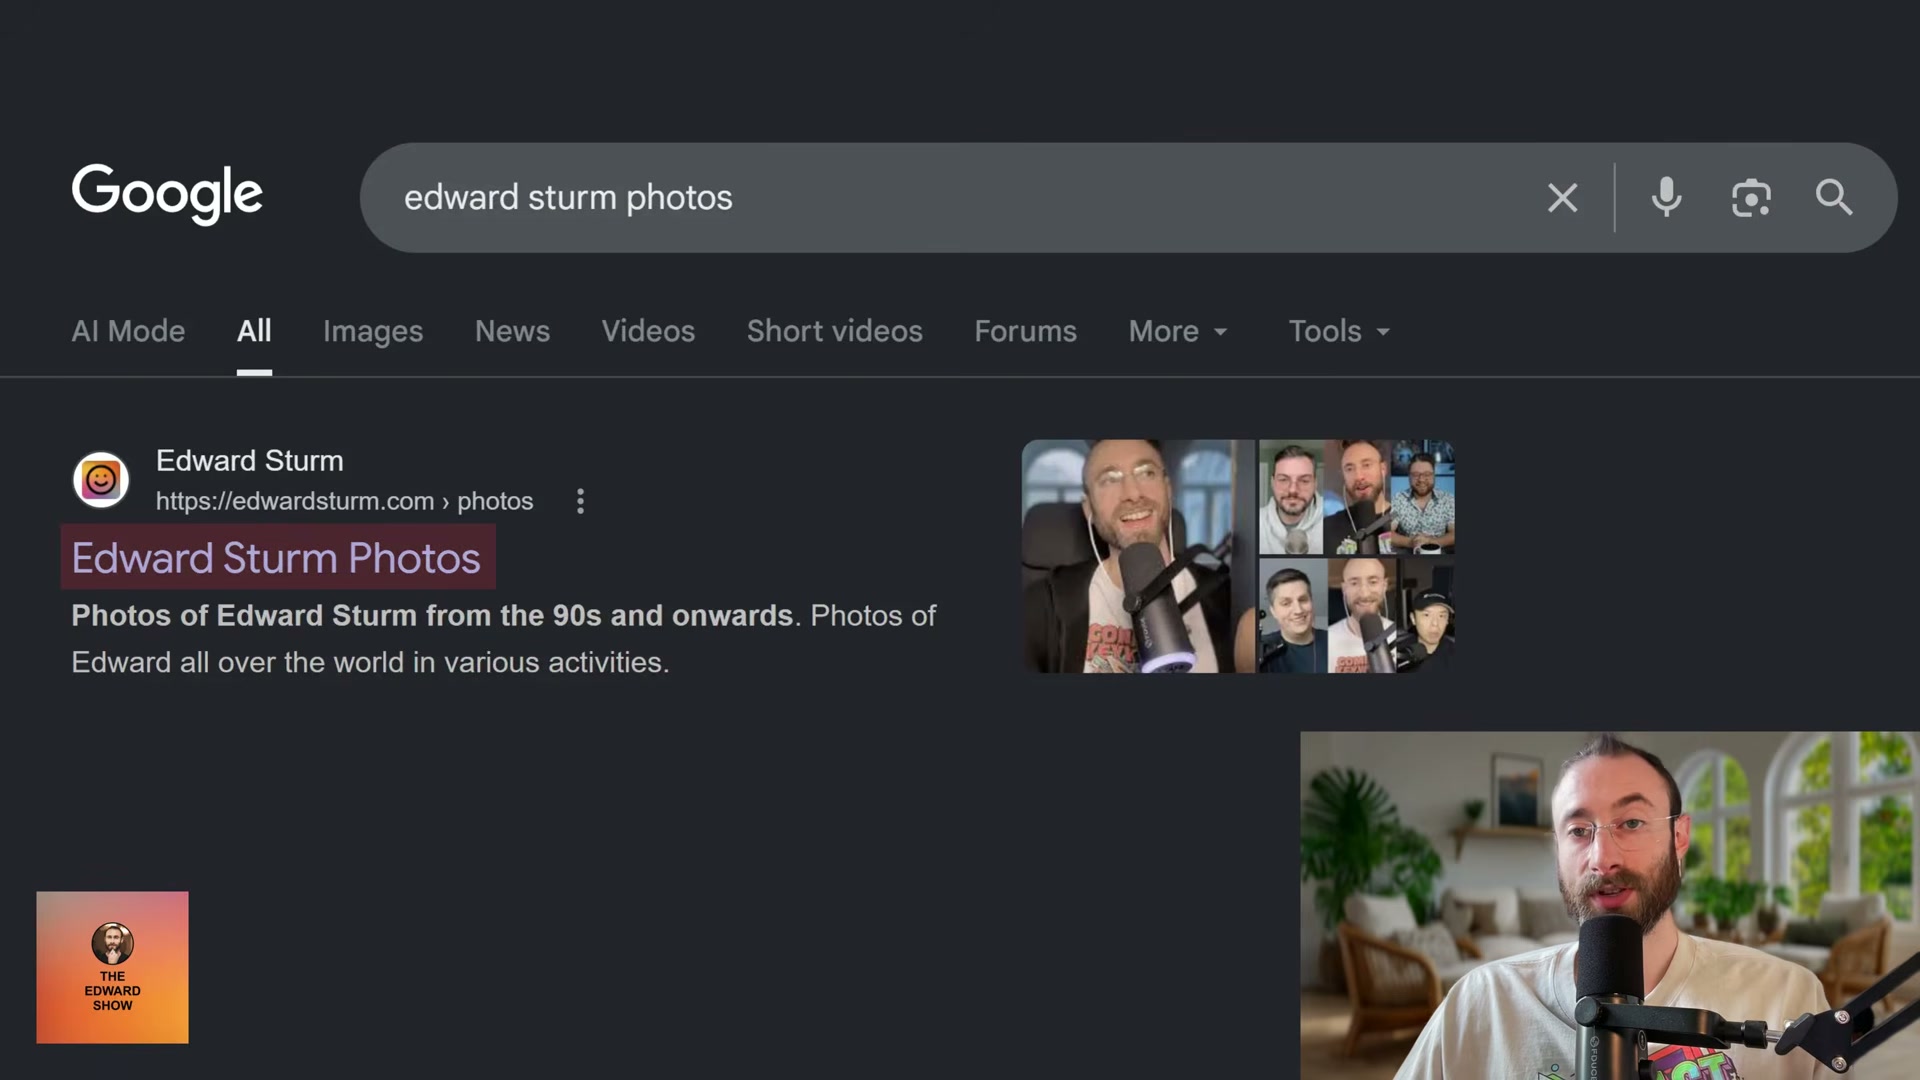
Bonus — Build a dedicated brand photos page. Creating a standalone page with a keyword-rich URL, a clear H1, original photography, and optimized captions lets you control what surfaces when someone searches your name or brand on Google Images. Each image on the page should carry its own descriptive alt text and caption; the page itself becomes an indexable asset that compounds over time.
How does this compare to the official docs?
Google’s own documentation on image SEO covers several of these practices, but the specifics — and a few meaningful gaps — reveal where this tutorial’s workflow aligns, where it diverges, and what the search quality guidelines actually prioritize.
Here’s What the Official Docs Show
The video’s core workflow holds up — the tools are real, the steps are sequenced logically, and the outcome metrics are plausible. What the documentation adds is a handful of operational details that will save you a wrong turn or two when you sit down to actually run the process.
Step 1 — Rename image files before uploading
No official documentation was found for this step —
proceed using the video’s approach and verify independently.
Step 2 — Compress and convert to WebP using CloudConvert
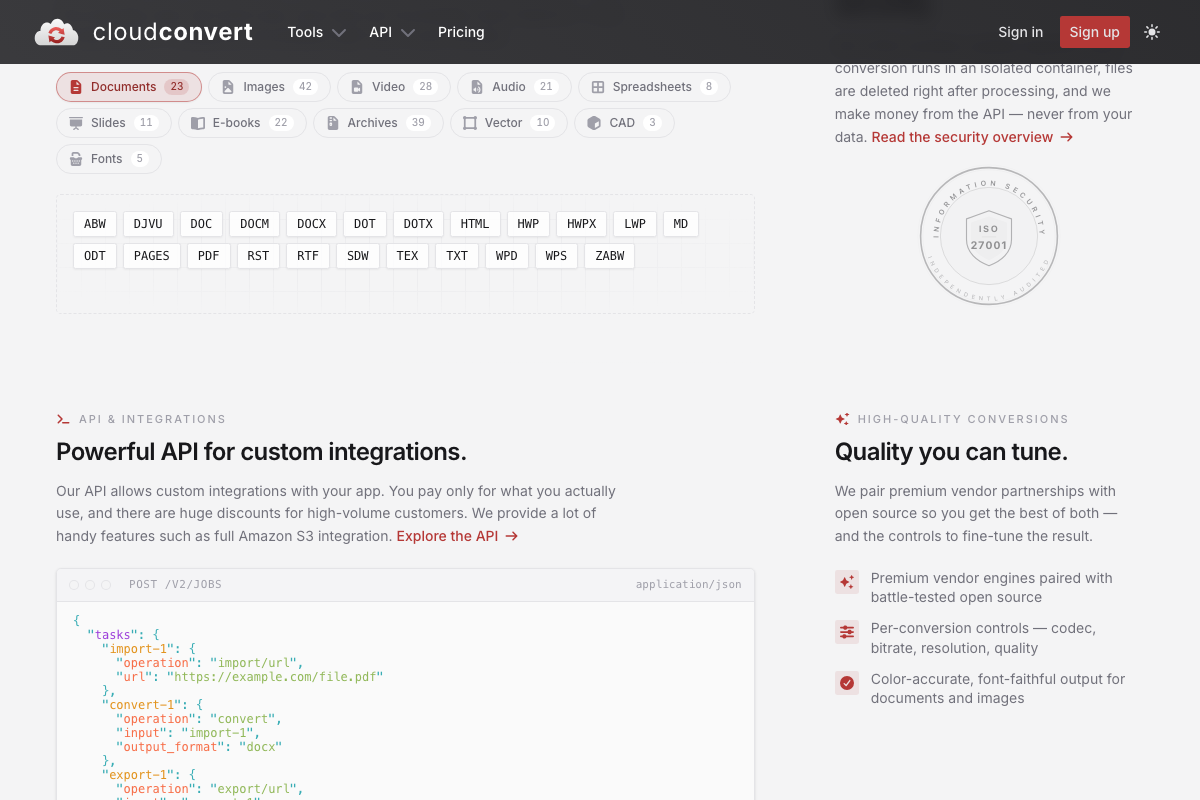
The video’s approach here matches the current docs exactly — CloudConvert is a real, established browser-based converter that handles image formats. One detail the tutorial skips: the homepage hero defaults to PDF → DOCX conversion. When you land on cloudconvert.com, you’ll need to manually change both the source format (select your image type) and the target format (select WebP) before uploading. It is not pre-configured for image work.
Step 3 — Generate alt text with AI
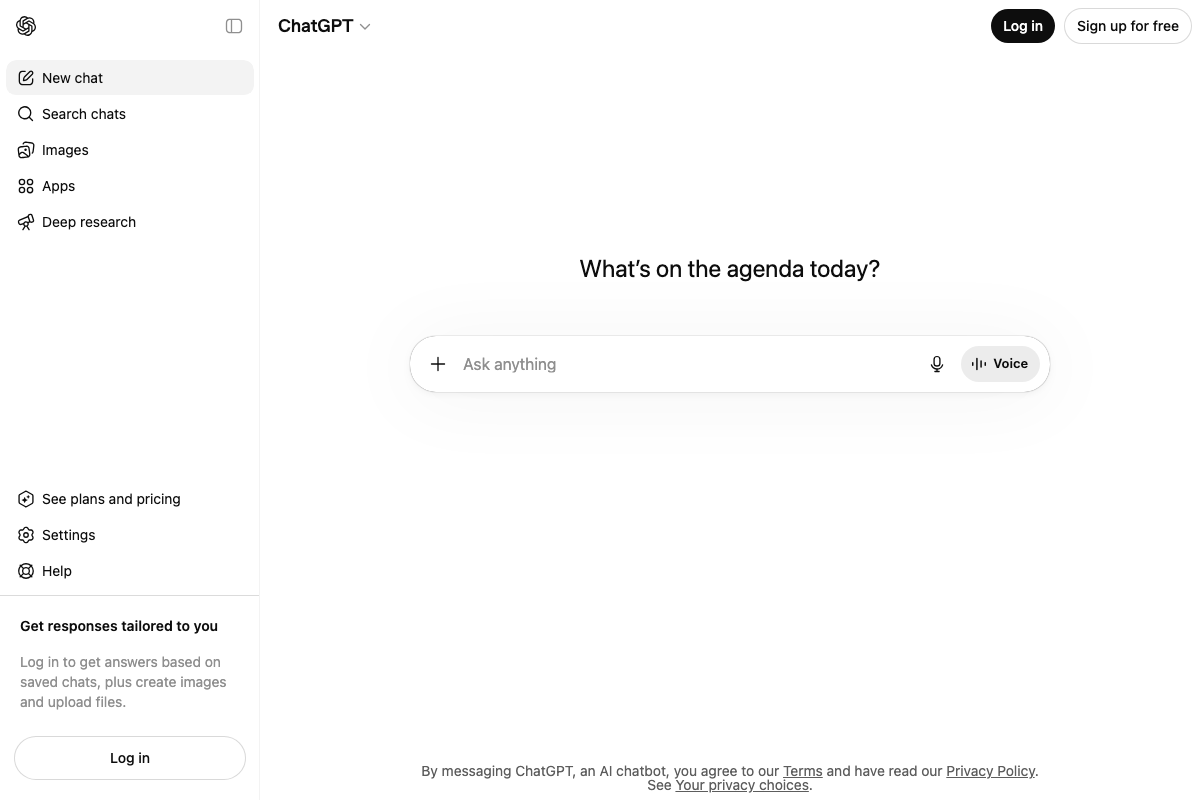
ChatGPT is accessible at chatgpt.com as a browser-based interface, consistent with what the video shows. One gap worth noting: file upload is gated behind a logged-in account. The sidebar text on the logged-out homepage explicitly states “Log in to get answers based on saved chats, plus create images and upload files.” If you plan to upload image file names as a batch (the approach the video recommends), you need to be signed in first. Pasting file names as plain text into the prompt works on the free tier without a file upload.
Step 4 — Use original images
No official documentation was found for this step —
proceed using the video’s approach and verify independently.
Step 5 — Place images near relevant headings and paragraphs
No official documentation was found for this step —
proceed using the video’s approach and verify independently.
Bonus — Build a dedicated brand photos page
Google Images is confirmed as a dedicated search property at images.google.com, which supports the tutorial’s logic: a standalone, well-optimized brand photos page gives you a targetable surface on a separate search index. Google Search Console measures the impressions and clicks the tutorial cites as outcome metrics — look for image-specific query data inside the authenticated Search Analytics report, which requires signing in. As of May 2026, that data lives under Performance → Search type: Image.


Useful Links
- ChatGPT — Browser-based AI assistant used in Step 3 to generate contextual alt text; file upload requires a logged-in account.
- File Converter | CloudConvert — Browser-based file conversion tool supporting 42+ image formats including WebP; manually select source and target formats after landing on the homepage.
- Google Images — Google’s dedicated image search property; the target surface for the bonus brand photos page strategy.
- Google Search Console — Google’s performance measurement tool for tracking impressions, clicks, and position; image-specific data is available inside the authenticated Search Analytics report filtered by image search type.
- Ahrefs — AI Marketing Platform Powered by Big Data — SEO and brand visibility platform featuring Brand Radar for tracking citations across AI chatbots; not referenced in the tutorial steps but relevant for measuring organic traffic outcomes.


0 Comments