Build an Enterprise AI Search Visibility Strategy
AI platforms like ChatGPT and Gemini aren’t just search engines — they’re recommendation engines that crawl, synthesize, and cite sources on your behalf. With only 60% overlap between traditional organic rankings and AI search visibility, strong Google performance no longer guarantees your brand appears in AI-generated answers. This tutorial walks you through auditing your current AI search performance, repairing technical foundations, and configuring site speed so AI crawlers can index and cite your content without friction. By the end, you’ll have a repeatable playbook you can pilot, validate, and scale across regions and product lines.

- Audit AI search visibility with professional tools. Skip manual prompting in ChatGPT or Gemini — query results vary on every run, making one-off checks useless at scale. Use Semrush’s AI Visibility Toolkit, Profound, or Peak.ai instead. These platforms track a visibility score, citation count, and topic-level performance over time, giving you trend data you can act on across territories and product lines. Monitor keyword rankings in parallel: the 60% overlap with AI visibility means traditional SEO progress still moves the needle.

-
Run a pilot before pushing changes across the organization. Once the audit surfaces opportunities, apply fixes to a single territory or product line first. Build a before-and-after playbook from that controlled rollout, then use verified results to secure buy-in from regional marketing teams. A tested result with documented lift travels further than a proposal.
-
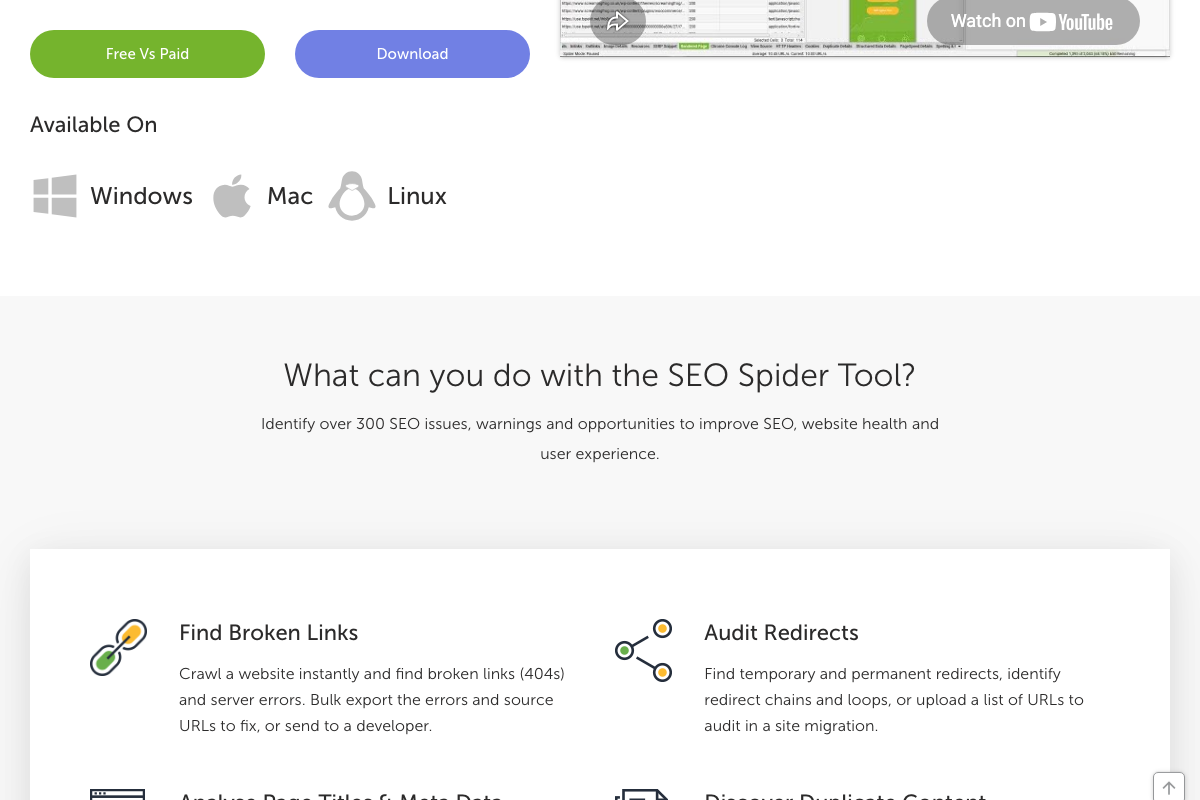
Fix technical SEO foundations with a full site crawl. Run the site through Screaming Frog, the Semrush site audit, and Google Search Console simultaneously. Prioritize crawl errors, redirect chains, broken links, duplicate content, missing canonicals, and Hreflang errors. On-page, address duplicate or missing H1s, missing meta descriptions, and missing image alt text — these issues degrade both traditional and AI search performance before you get anywhere near AI-specific optimizations.
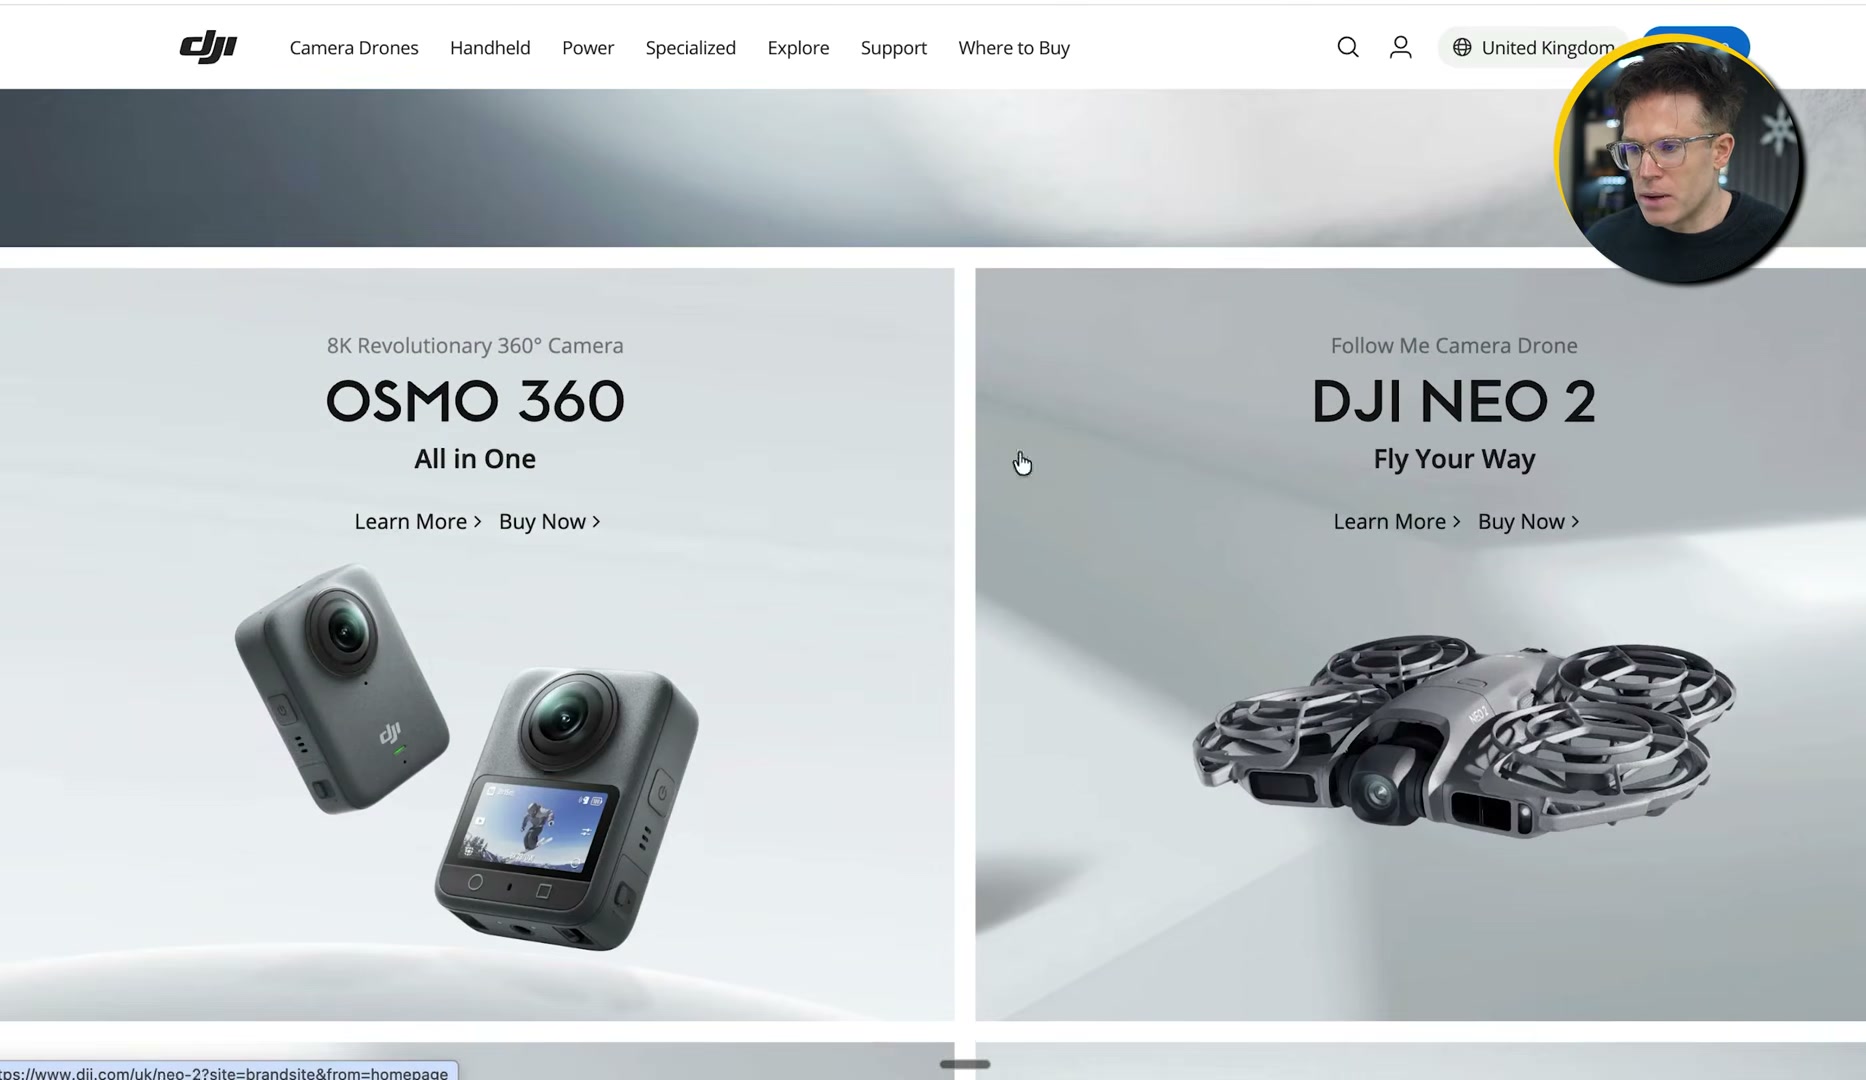
- Audit JavaScript rendering through Chrome DevTools. Open DevTools, disable JavaScript, then reload the page. What remains visible approximates what an AI crawler actually processes. On JavaScript-heavy product sites — the tutorial demonstrates this on DJI’s site — disabling JS strips product names, descriptions, and supporting copy entirely, leaving AI indexing with nothing to work from.
Warning: this step may differ from current official documentation — see the verified version below.
-
Verify GPTBot and ClaudeBot are not blocked in robots.txt. Open your robots.txt file and confirm neither bot is disallowed. Blocking them removes your content from the crawl queue entirely — a silent misconfiguration that can make an entire product catalog invisible to AI platforms simultaneously.
-
Implement schema markup correctly. Structured data tells AI tools the content type they’re reading in a standardized format they reliably interpret. Validate your implementation; missing or malformed schema is a common enterprise oversight that surfaces only under audit conditions.
-
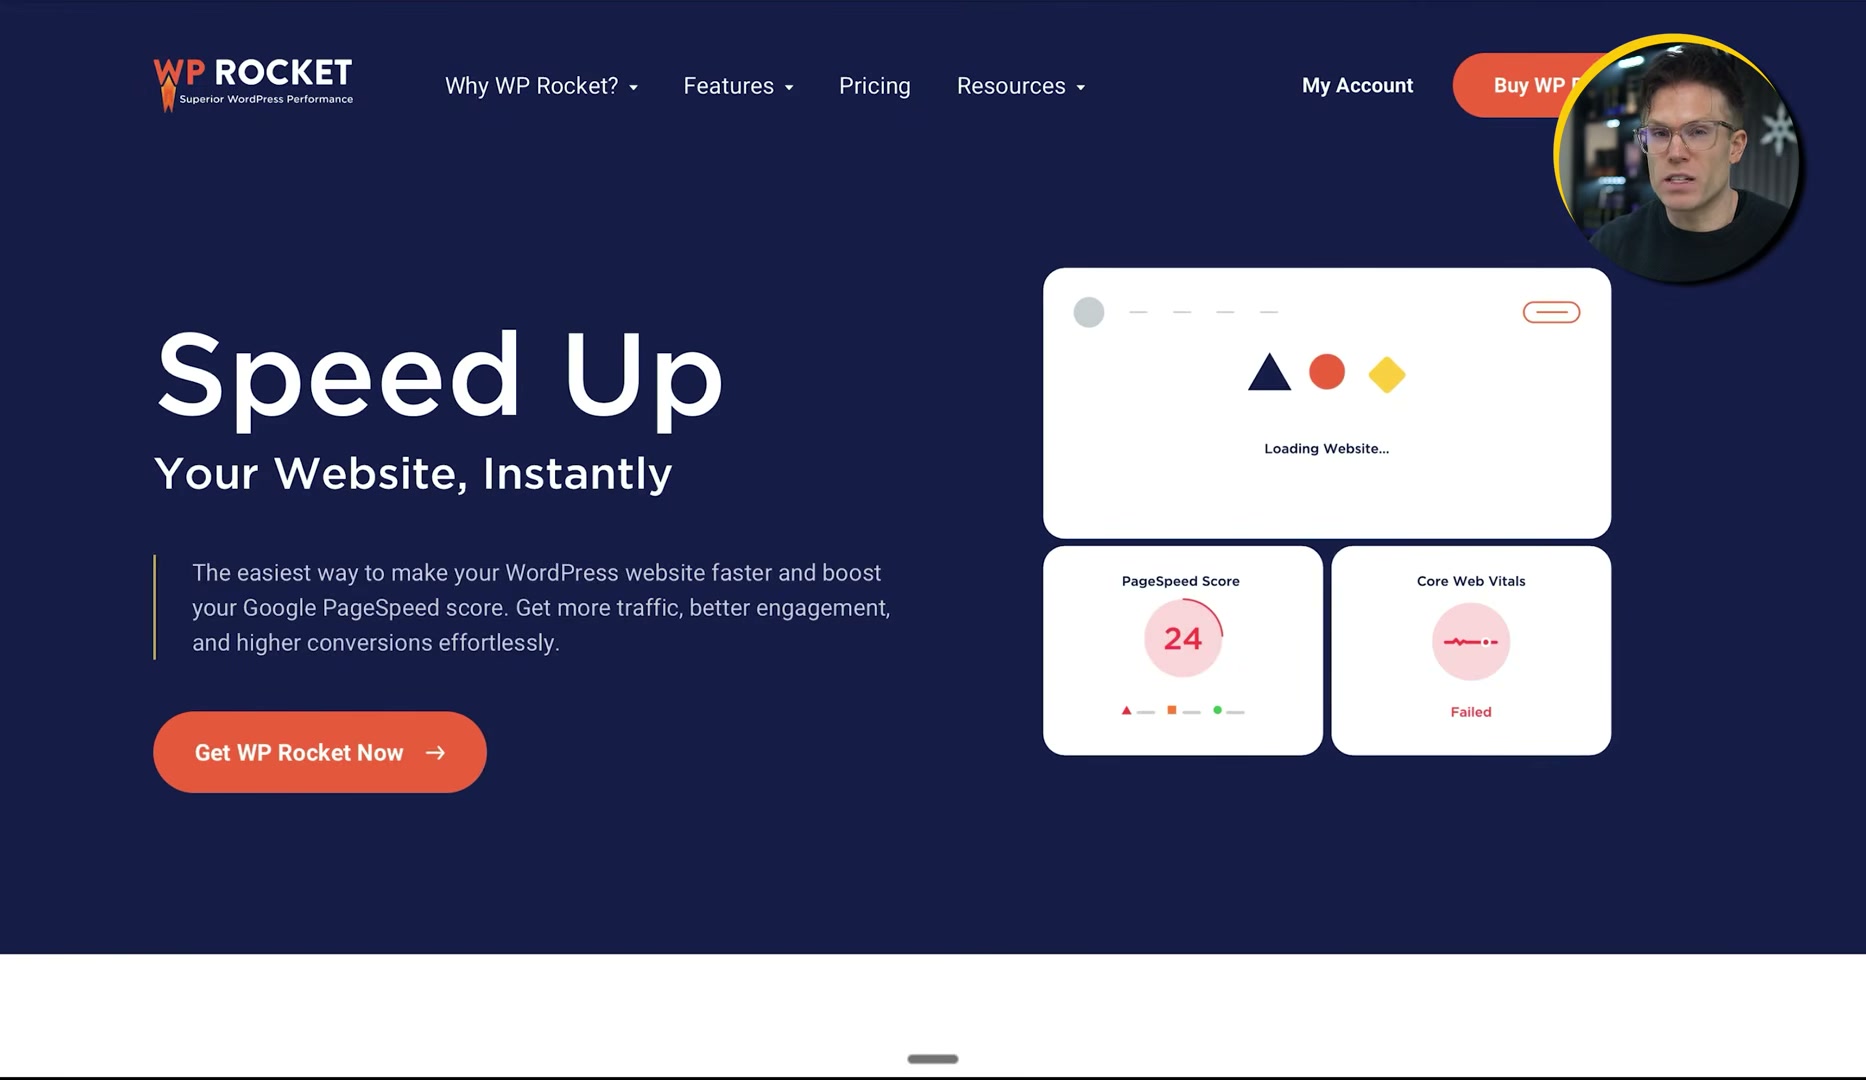
Install WP Rocket and configure CSS, media, and caching. On WordPress, activate optimized CSS delivery and enable “Remove unused CSS” under that setting. Turn on lazy load for images and videos. Under Media settings, enable “Add missing image dimensions” to prevent Cumulative Layout Shift — a Core Web Vitals metric AI crawlers factor into page quality scoring. Enable caching so crawlers receive pre-built HTML immediately, bypassing JavaScript execution entirely.

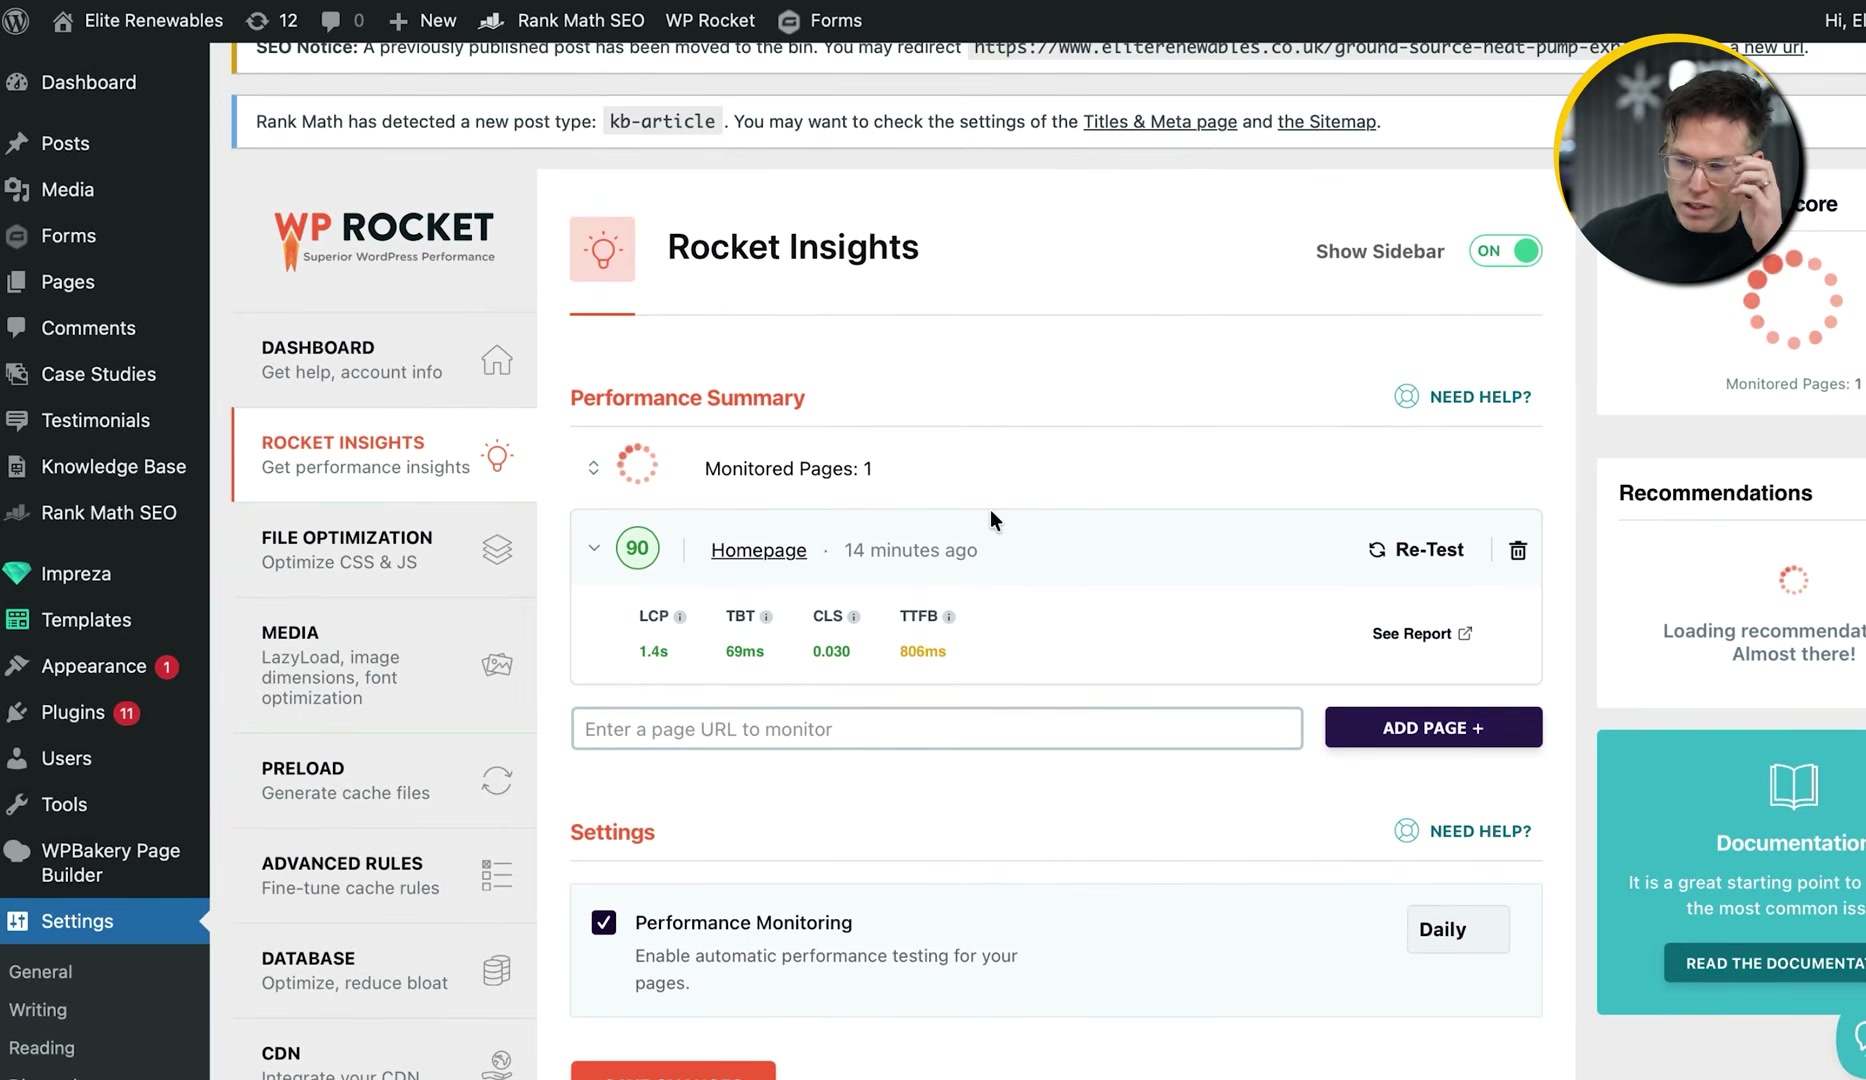
- Use Rocket Insights to diagnose per-page Core Web Vitals. Navigate to the Rocket Insights tab inside WP Rocket. It displays LCP, TBT, CLS, and TTFB for each tracked page with daily updates. Where scores slip, the plugin surfaces targeted recommendations — including single-click fixes like self-hosting Google Fonts — reducing the dev ticket backlog that typically stalls enterprise speed work.
- Validate improvements with PageSpeed Insights and GTmetrix. Run optimized pages through PageSpeed Insights for a scored Core Web Vitals report and GTmetrix’s waterfall view to isolate remaining request-level bottlenecks.
How does this compare to the official docs?
Several of these configuration steps carry technical caveats the video moves past quickly — Act 2 checks each one against current documentation from Google, the robots.txt specification, and WP Rocket’s developer resources to surface the details that determine whether these fixes actually hold.
Here’s What the Official Docs Show
Act 1 maps the full strategy from the video’s perspective. What follows adds the documentation layer — a product name update, a pricing constraint that matters at enterprise scale, and one plugin behavior that changes your starting point in Step 7.
Step 1 — Audit AI search visibility
The video’s approach here matches the current docs exactly. One name to update: as of April 2026, the correct product name is Semrush One — “AI Toolkit” does not appear anywhere on the current official Semrush site. The AI visibility tracking capabilities described in the video are confirmed as live features.

Step 2 — Run a pilot before scaling
No official documentation was found for this step — proceed using the video’s approach and verify independently.
Step 3 — Fix technical SEO foundations
The video’s approach here matches the current docs exactly. Every issue category named — broken links, redirect chains, duplicate content, missing meta data — is confirmed in Screaming Frog’s official feature list. Two additions the video skips: the free tier caps crawls at 500 URLs (paid licence: £199/year — a real constraint for the enterprise-scale sites this tutorial targets), and Screaming Frog integrates directly with Google Analytics, Search Console, and PageSpeed Insights APIs to pull per-URL data in a single pass.
Step 4 — Audit JavaScript rendering via Chrome DevTools
No official documentation was found for this step — proceed using the video’s approach and verify independently.
One documented alternative: Screaming Frog includes a built-in Chromium renderer (“Crawl JavaScript Websites”) that surfaces JS-rendered content within the same crawl audit — no DevTools toggle required. For sites already running Screaming Frog in Step 3, this may be a more efficient path to the same diagnostic output.
Step 5 — Verify GPTBot and ClaudeBot in robots.txt
No official documentation was found for this step — proceed using the video’s approach and verify independently.
Screaming Frog’s “Review Robots & Directives” feature surfaces robots.txt blocks, meta robots, and X-Robots-Tag directives within the same crawl, complementing the manual file check described here.

Step 6 — Implement schema markup
No official documentation was found for this step — proceed using the video’s approach and verify independently.
Step 7 — Install WP Rocket and configure performance settings
The video’s approach here matches the current docs exactly on tool selection. One important context note: the official WP Rocket site states that 80% of web performance best practices apply automatically on activation. The CSS delivery, unused CSS removal, lazy load, and caching steps presented in Act 1 may already be active out of the box — confirm your default state before working through the list manually.
The official WP Rocket ecosystem also includes Imagify, a standalone image compression plugin from the same team that converts images to WebP and AVIF. The video covers lazy load and image dimensions inside WP Rocket but does not name Imagify. If next-gen image formats are on your Core Web Vitals checklist, this is the dedicated tool.

Step 8 — Use Rocket Insights for per-page Core Web Vitals
The video’s approach here matches the current docs exactly. Rocket Insights is confirmed as a performance hub covering Core Web Vitals monitoring and targeted optimization recommendations. The specific UI label “tab” used in the video is not confirmed at the marketing page level — treat the navigation path as approximate until you’re inside the plugin.
Step 9 — Validate with PageSpeed Insights and GTmetrix
The video’s approach here matches the current docs exactly. PageSpeed Insights covers both mobile and desktop — a scope Step 9 doesn’t specify. GTmetrix confirms the Waterfall tab as a live feature; reports also include a CRUX tab (real-user Chrome field data) and a Speed Visualization timeline that Step 9 doesn’t mention but are worth exploring. Note: the GTmetrix support documentation URL returned a 404 at time of capture — rely on in-app guidance for implementation details.


Step 10
No official documentation was found for this step — proceed using the video’s approach and verify independently.
Useful Links
- Semrush — Unified SEO and AI search visibility platform, currently marketed as Semrush One
- Screaming Frog SEO Spider — Cross-platform technical SEO crawler with built-in JavaScript rendering; free tier limited to 500 URLs, paid licence £199/year
- Google Search Console — Free Google tool for measuring search traffic and diagnosing crawl and indexing issues
- Chrome DevTools — Browser-native developer tools for page inspection, performance analysis, and JavaScript auditing
- WP Rocket — WordPress speed optimization plugin with automatic performance defaults and built-in Rocket Insights monitoring
- PageSpeed Insights — Google’s URL-based Core Web Vitals scoring tool covering both mobile and desktop
- GTmetrix — Website speed testing platform with Waterfall view, CRUX field data, and proprietary performance grading
- Imagify — Standalone WordPress image optimization plugin from the WP Rocket team with one-click WebP and AVIF conversion


0 Comments